Integration Guide
Step 1: Account Setup
By the end of this guide, you will:
- Complete account verification to unlock full platform features.
- Customize your account settings for a seamless experience.
- Set up payment preferences to suit your business needs.
This guide is designed to make onboarding simple and straightforward. Follow the steps, and you'll be ready to use the platform in no time.
Registration
Create Your Account
- Go to the CoinPayments website, click on Sign Up to Create your CoinPayments account.
- Enter your email, create a strong password, and agree to the terms and conditions.

Verify your Email
Check your inbox for the verification code from CoinPayments to confirm your account.
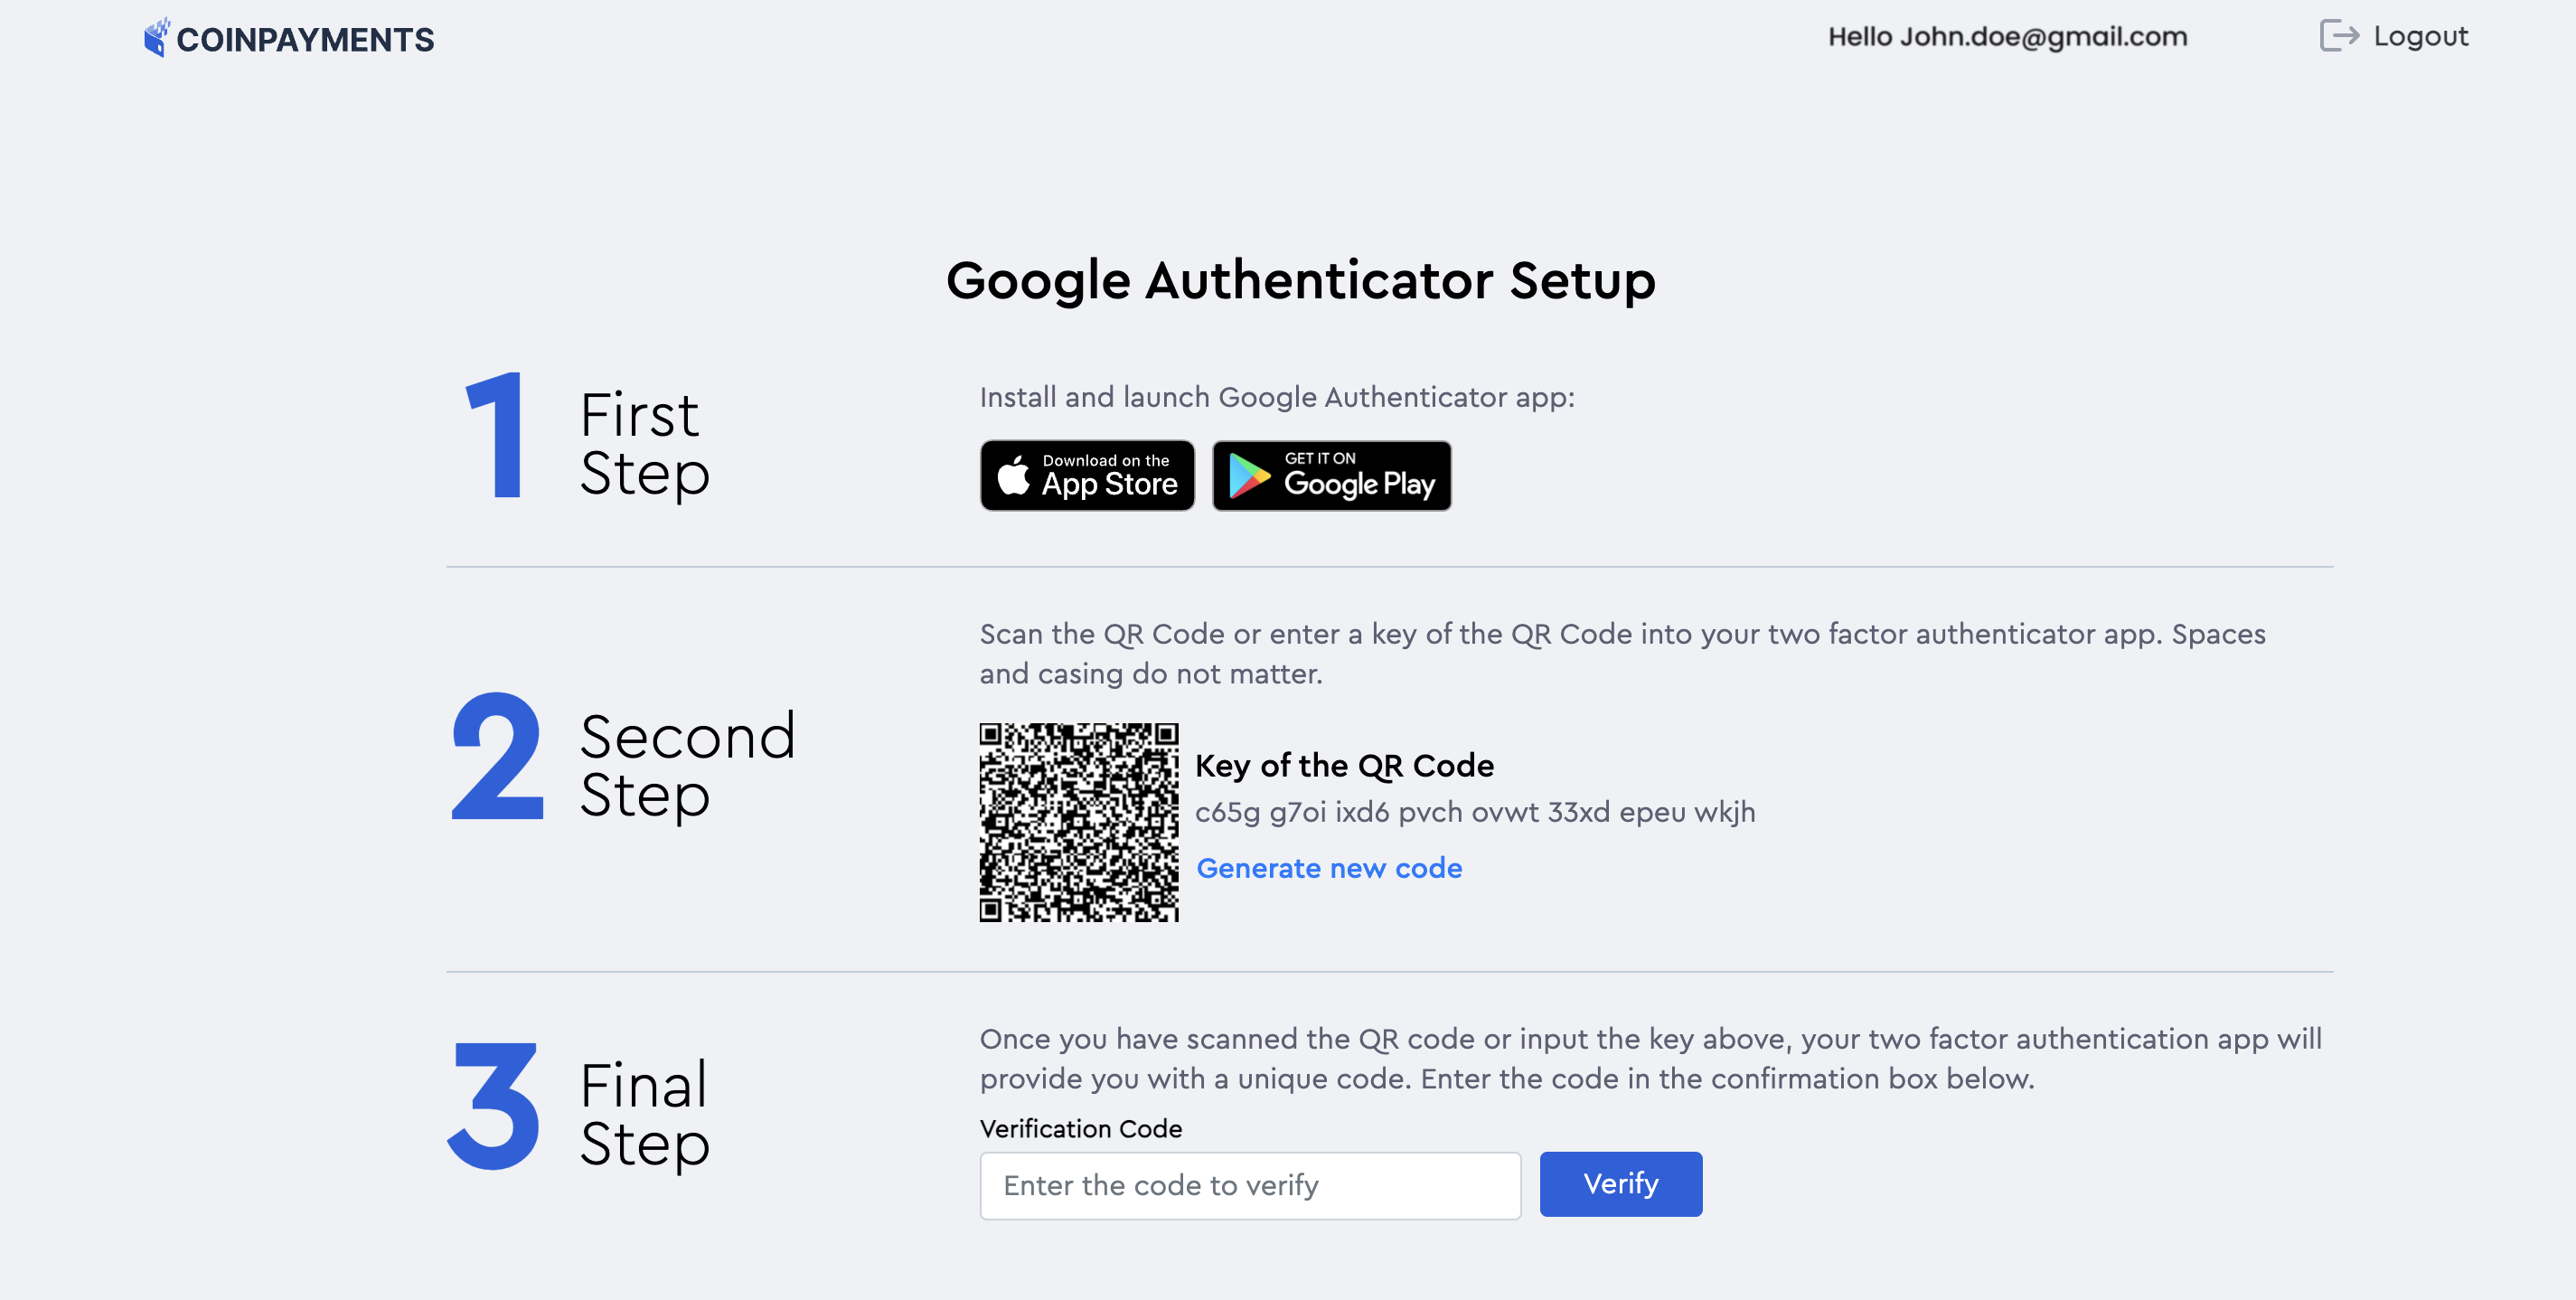
Enable 2FA
Secure your account and enable two-factor authentication (2FA) immediately after signing up by installing and setting up the Google Authenticator app.
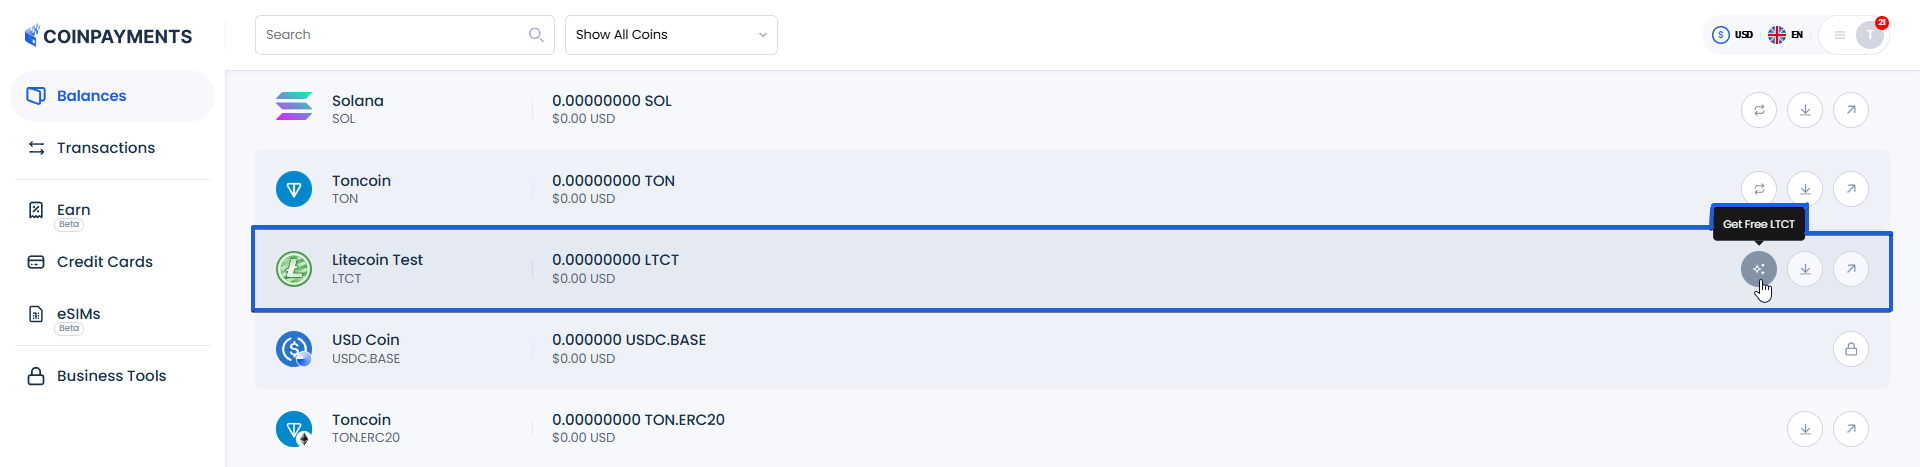
Access Sandbox Environment
Once you've signed up, explore the sandbox environment with LTCT test currency to try out different transaction types and integrations.
Account Verification
Verification is an essential step to unlock the full features of your CoinPayments account. It ensures compliance with regulatory requirements, enhances security, protects you from potential fraud and provides access to advanced platform features.
We understand that verification can sometimes feel overwhelming, so we've simplified the process with a tiered approach tailored to your account type - whether personal or business. This ensures you provide only what's necessary for your specific needs.
To further streamline the process, we've partnered with SumSub, a trusted platform used by leading financial institutions. SumSub prioritizes data protection, adhering to GDPR and other compliance standards, so you can complete your verification with confidence.
This guide will walk you through each step of the verification process, outlining requirements for personal and business accounts, and show you how to get support if needed.
Account Type
At CoinPayments, we offer two main account types to suit your needs: Personal Account and Business Account. Here's what each entails and the steps to complete verification:
Personal Account
- Ideal for individuals using the platform for personal transactions.
- Personal account users do not have access to commercial tools like Invoicing and integrations (payment buttons, pre-built plug-ins, API integration).
Personal Account Verification Steps
- Confirm your tax residence country.
- Provide your personal information.
- Submit a valid government-issued identity document (e.g., passport).
- Provide a valid proof of address not older than 3 months (e.g., utility bill).
- Perform a liveness check using your webcam or mobile device.
- Complete a short questionnaire to finalize verification.
Business Account
- Designed for businesses, with options for unincorporated and incorporated entities.
- Business account users have access to commercial tools like Invoicing and integrations (payment buttons, pre-built plug-ins, API integration).
Unincorporated Business Verification Steps
- Select your business type.
- Complete a commercial questionnaire.
- Confirm the tax residence country.
- Provide personal information of the business owner.
- Submit proof of identity.
- Provide proof of address.
Incorporated Business Verification Steps
- Provide your company data:
- Country (required)
- Company name (required)
- Registration number (required)
- Legal address (required)
- Entity type (required)
- Submit a document explaining your company ownership structure (You can provide one of the following):
- Shareholder registry
- Statement of information
- Trust agreement
- Recent excerpt from a state company registry
- Provide details of your company associated parties
- Complete a business questionnaire.
Resolving Identity Verification Issues
If you encounter challenges during the verification process, and the issue cannot be easily resolved through your verification dashboard, here's how to get help:
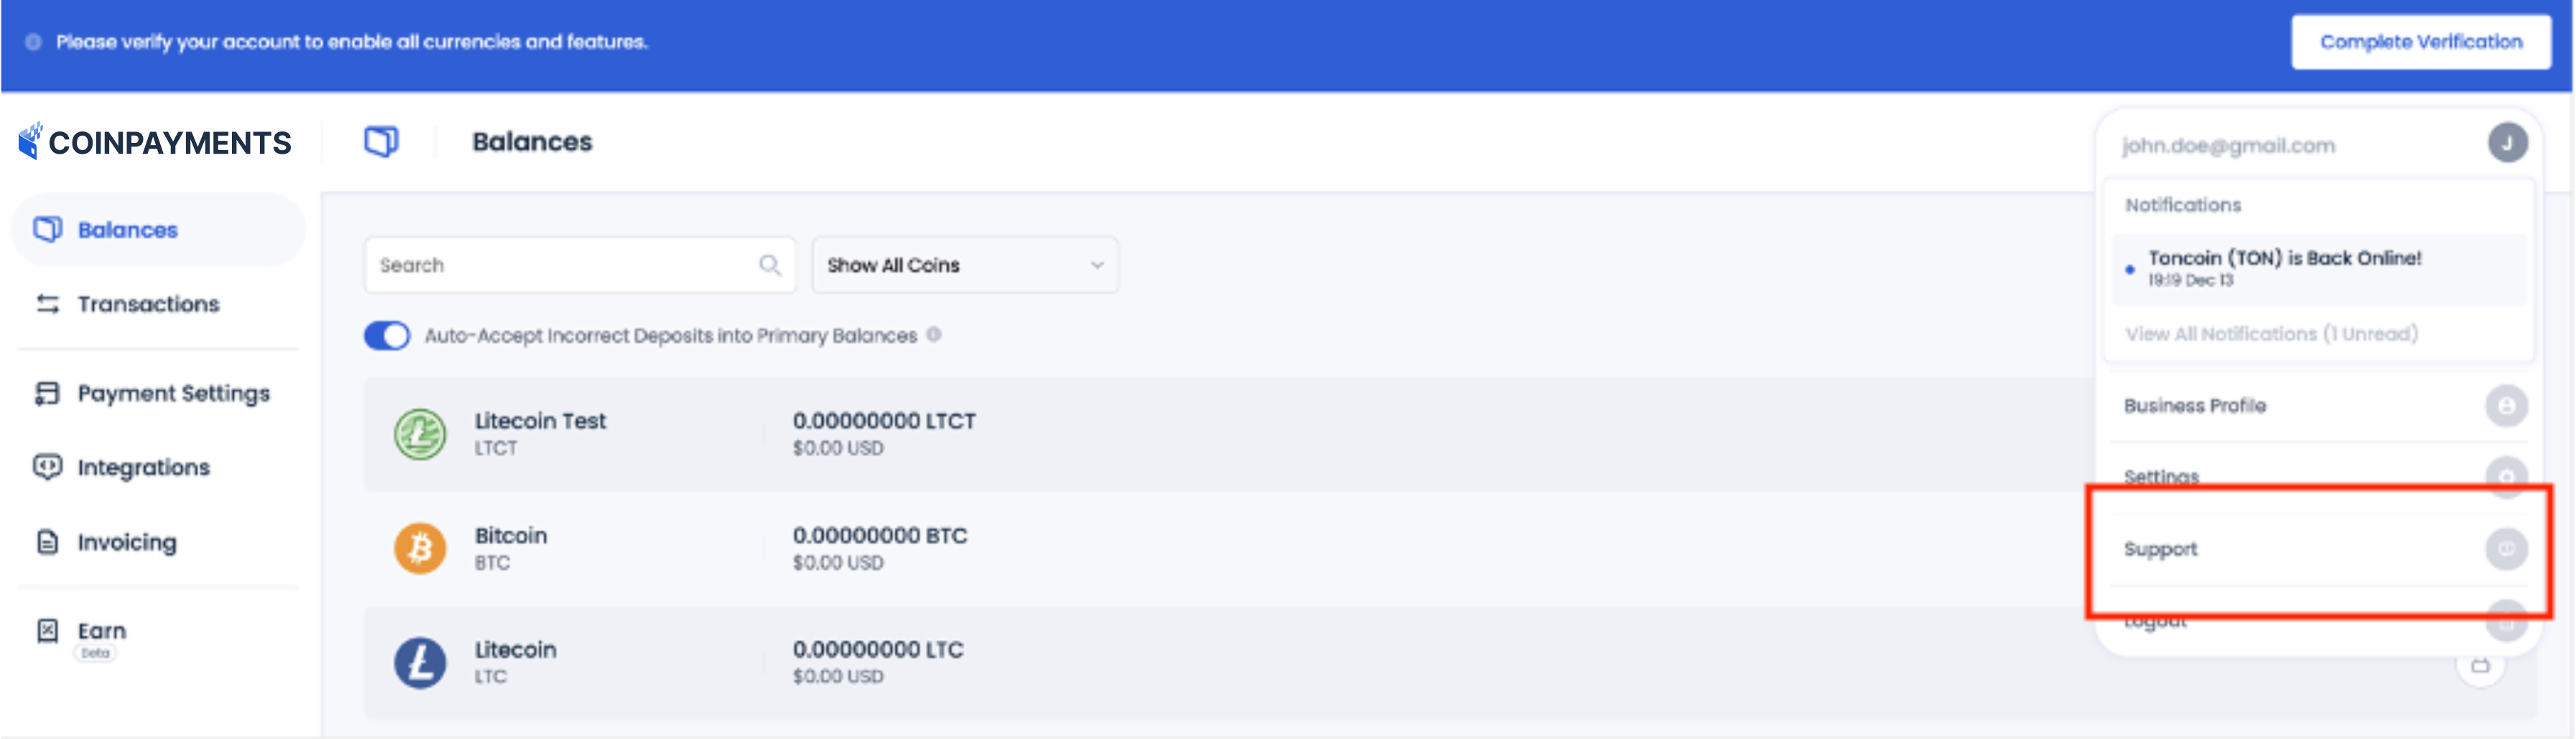
Access Support Menu
- Log in to your CoinPayments account.
- Navigate to Account > Support from the dashboard.
Provide Details
- Clearly describe the problem you're facing (e.g., unsupported document type, unclear files, etc.).
- Attach any relevant screenshots or files to support your request.
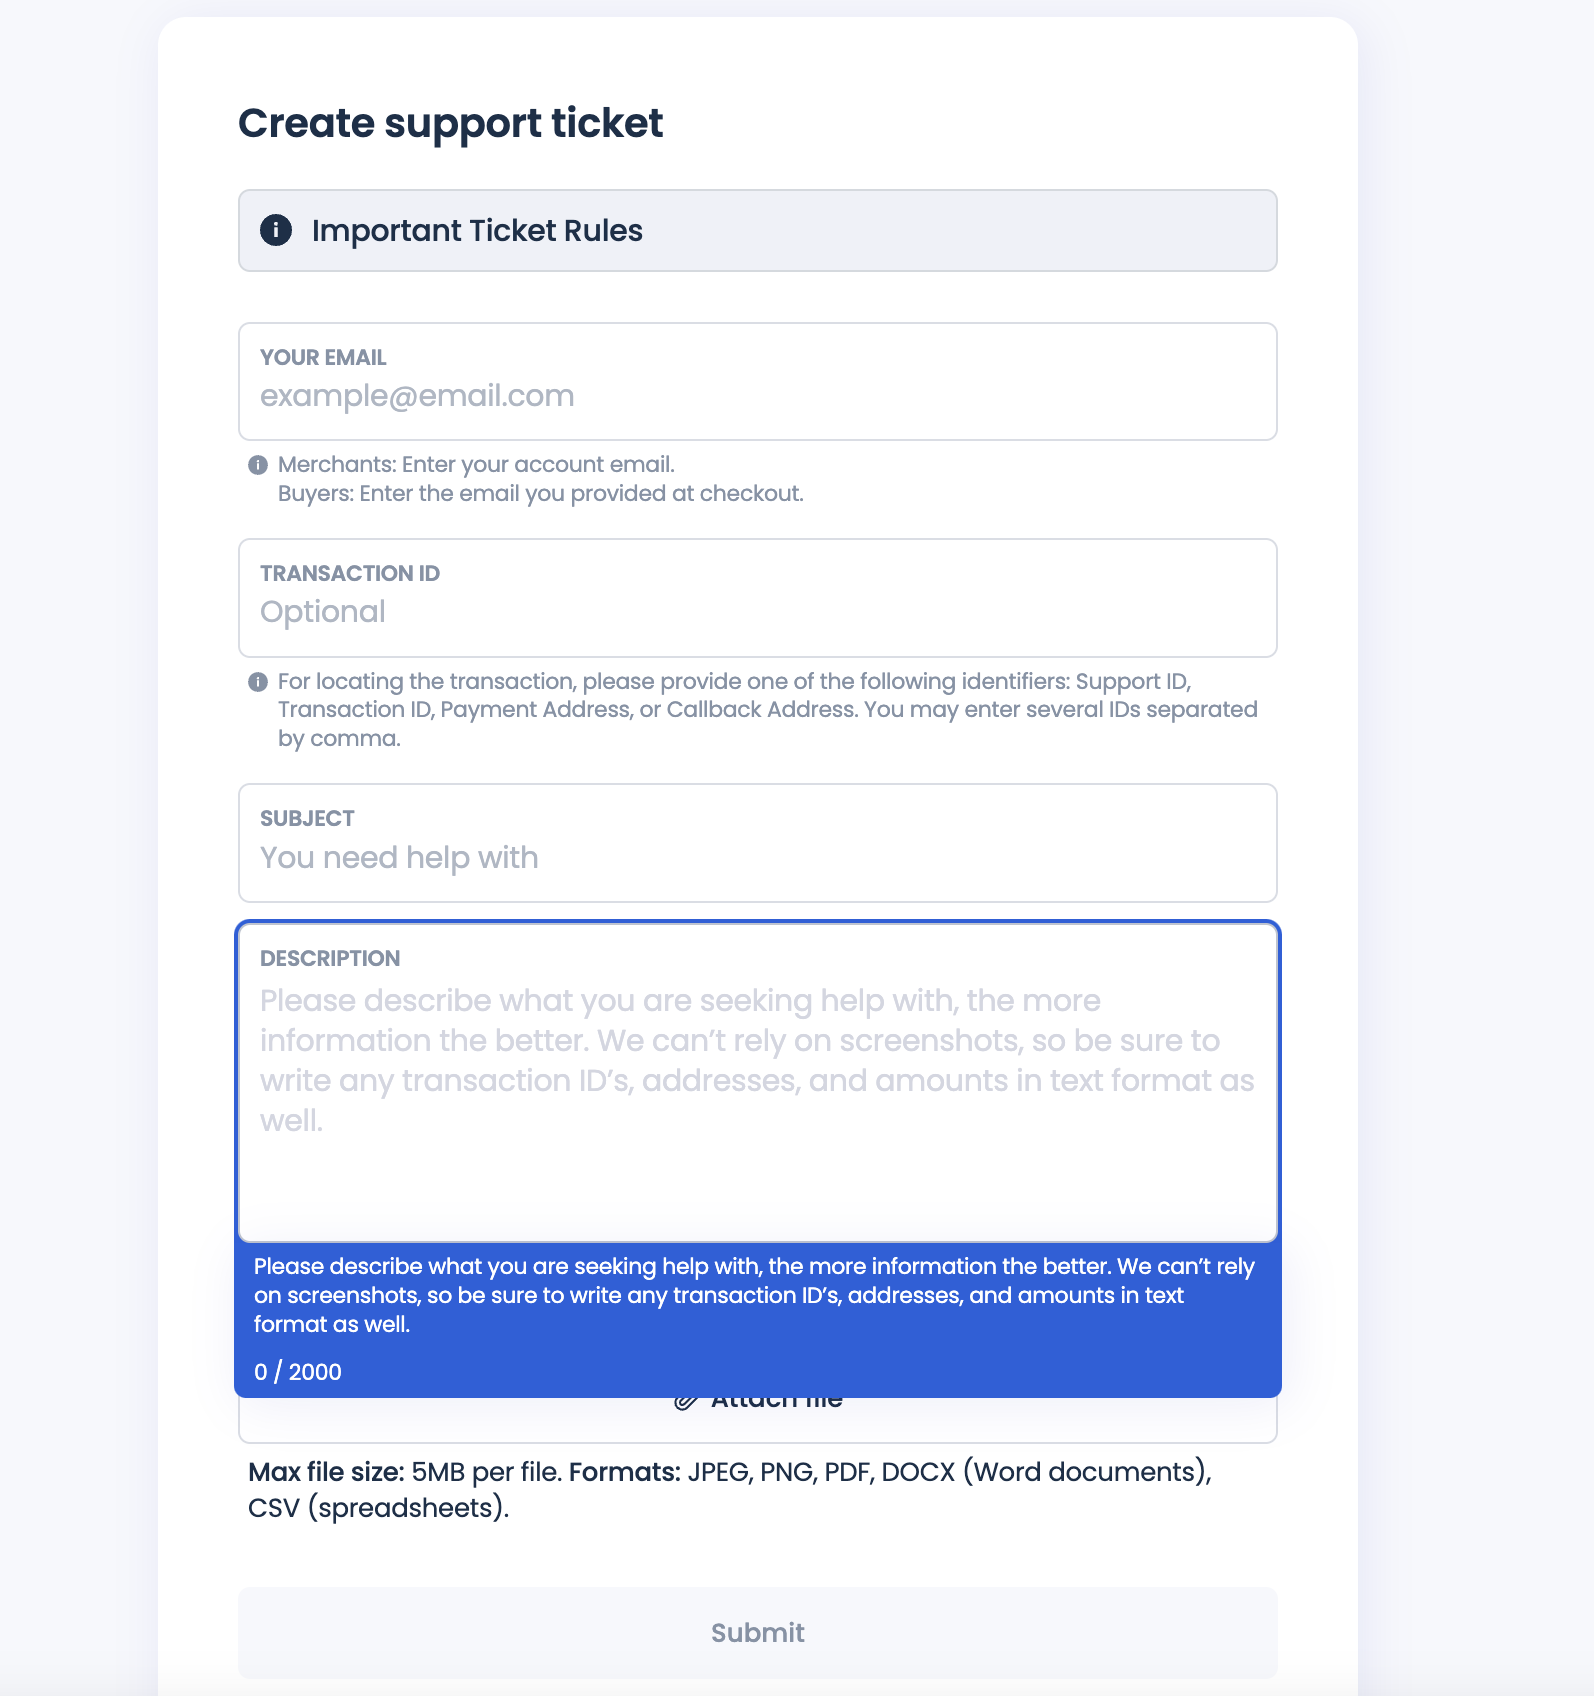
Submit Ticket
- Once your details are added, submit the ticket through the support interface.
- A customer support representative will review your request and contact you
Our support team is dedicated to helping you resolve any identity verification issues you may encounter. We appreciate your cooperation and understanding throughout the verification process.
If additional documents are needed based on your company's country of incorporation, region, or ownership structure, we will promptly request them to expedite the onboarding process. If your submission meets our initial requirements, you will receive an email with links to verify company shareholders and/or representatives.
Setting Up Your Account
Once you've created your account and logged in, here's how you can customize your settings for a seamless experience.
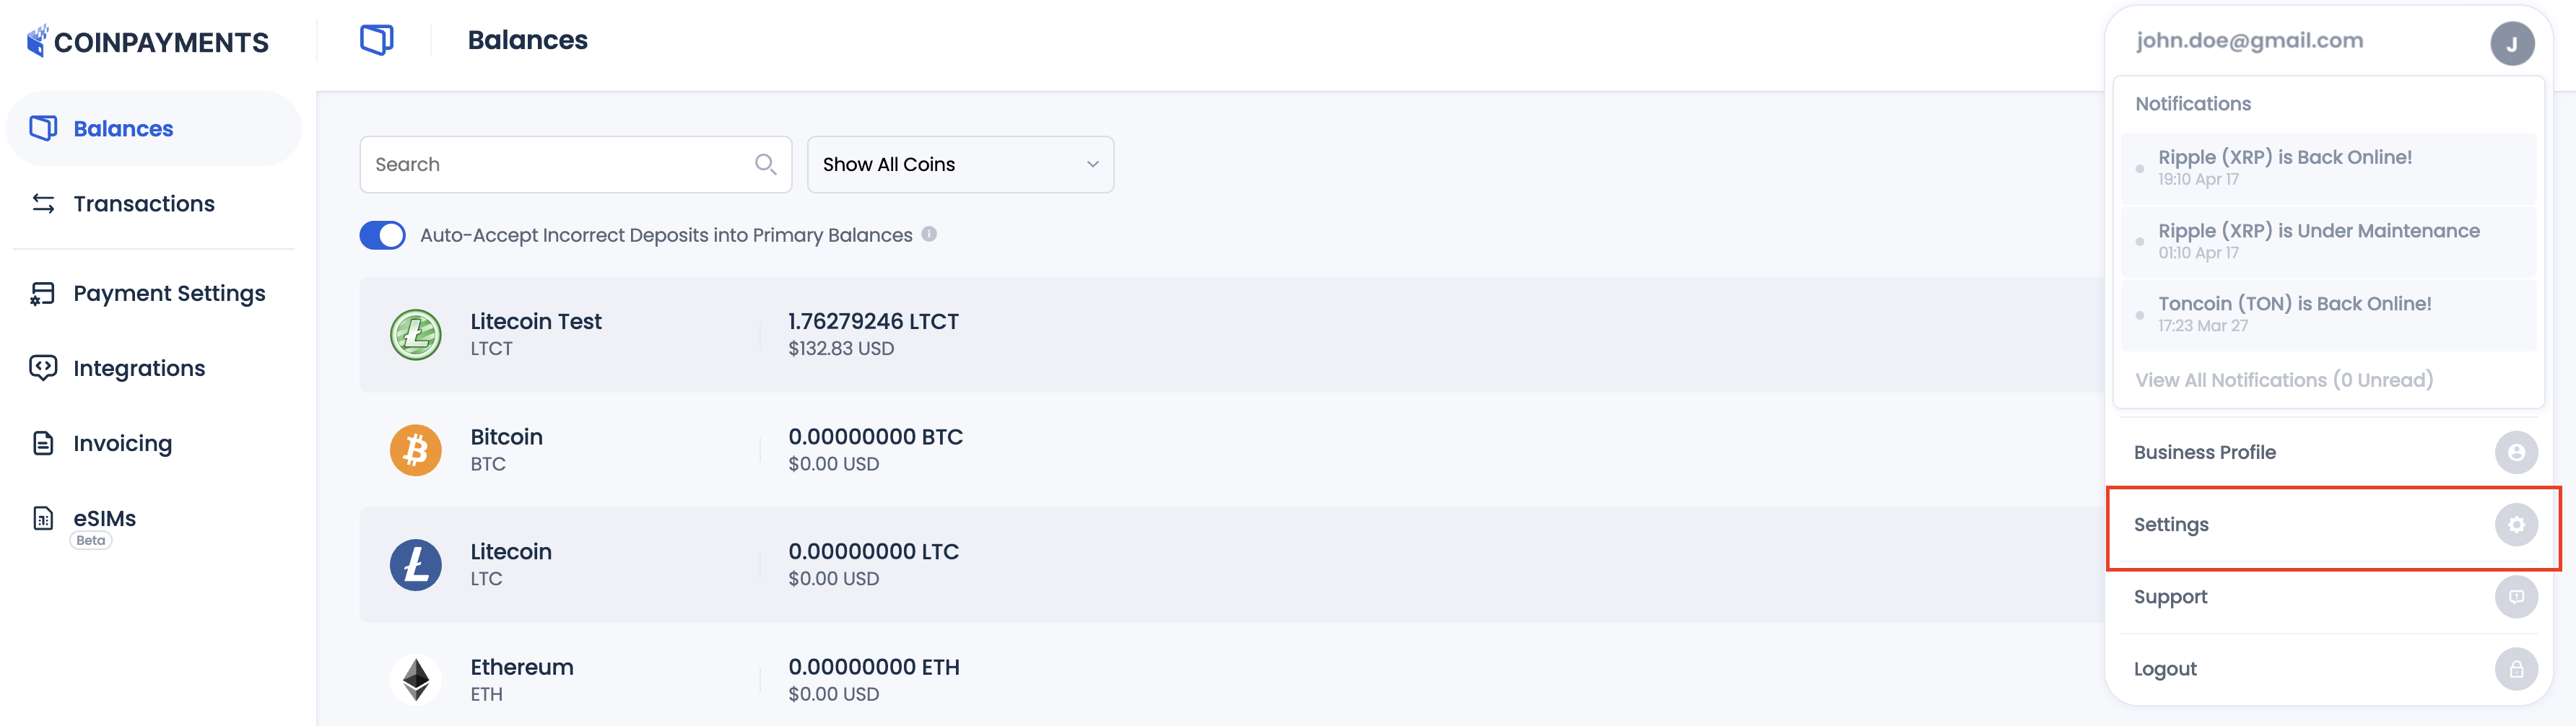
Navigate to Account Settings
- Log in to your CoinPayments account.
- Go to Account > Settings from the dashboard.
Customize Preferences
Adjust the following to suit your needs:
- Timezone: Set your local timezone for accurate transaction timestamps.
- Preferred Fiat Currency: Choose a default fiat currency for displaying balances. This currency will also appear as the “native” currency for transaction details and fees in API responses and webhooks.
- Notifications: Enable or disable email alerts for account activity.
- Password: Change your password to maintain security.
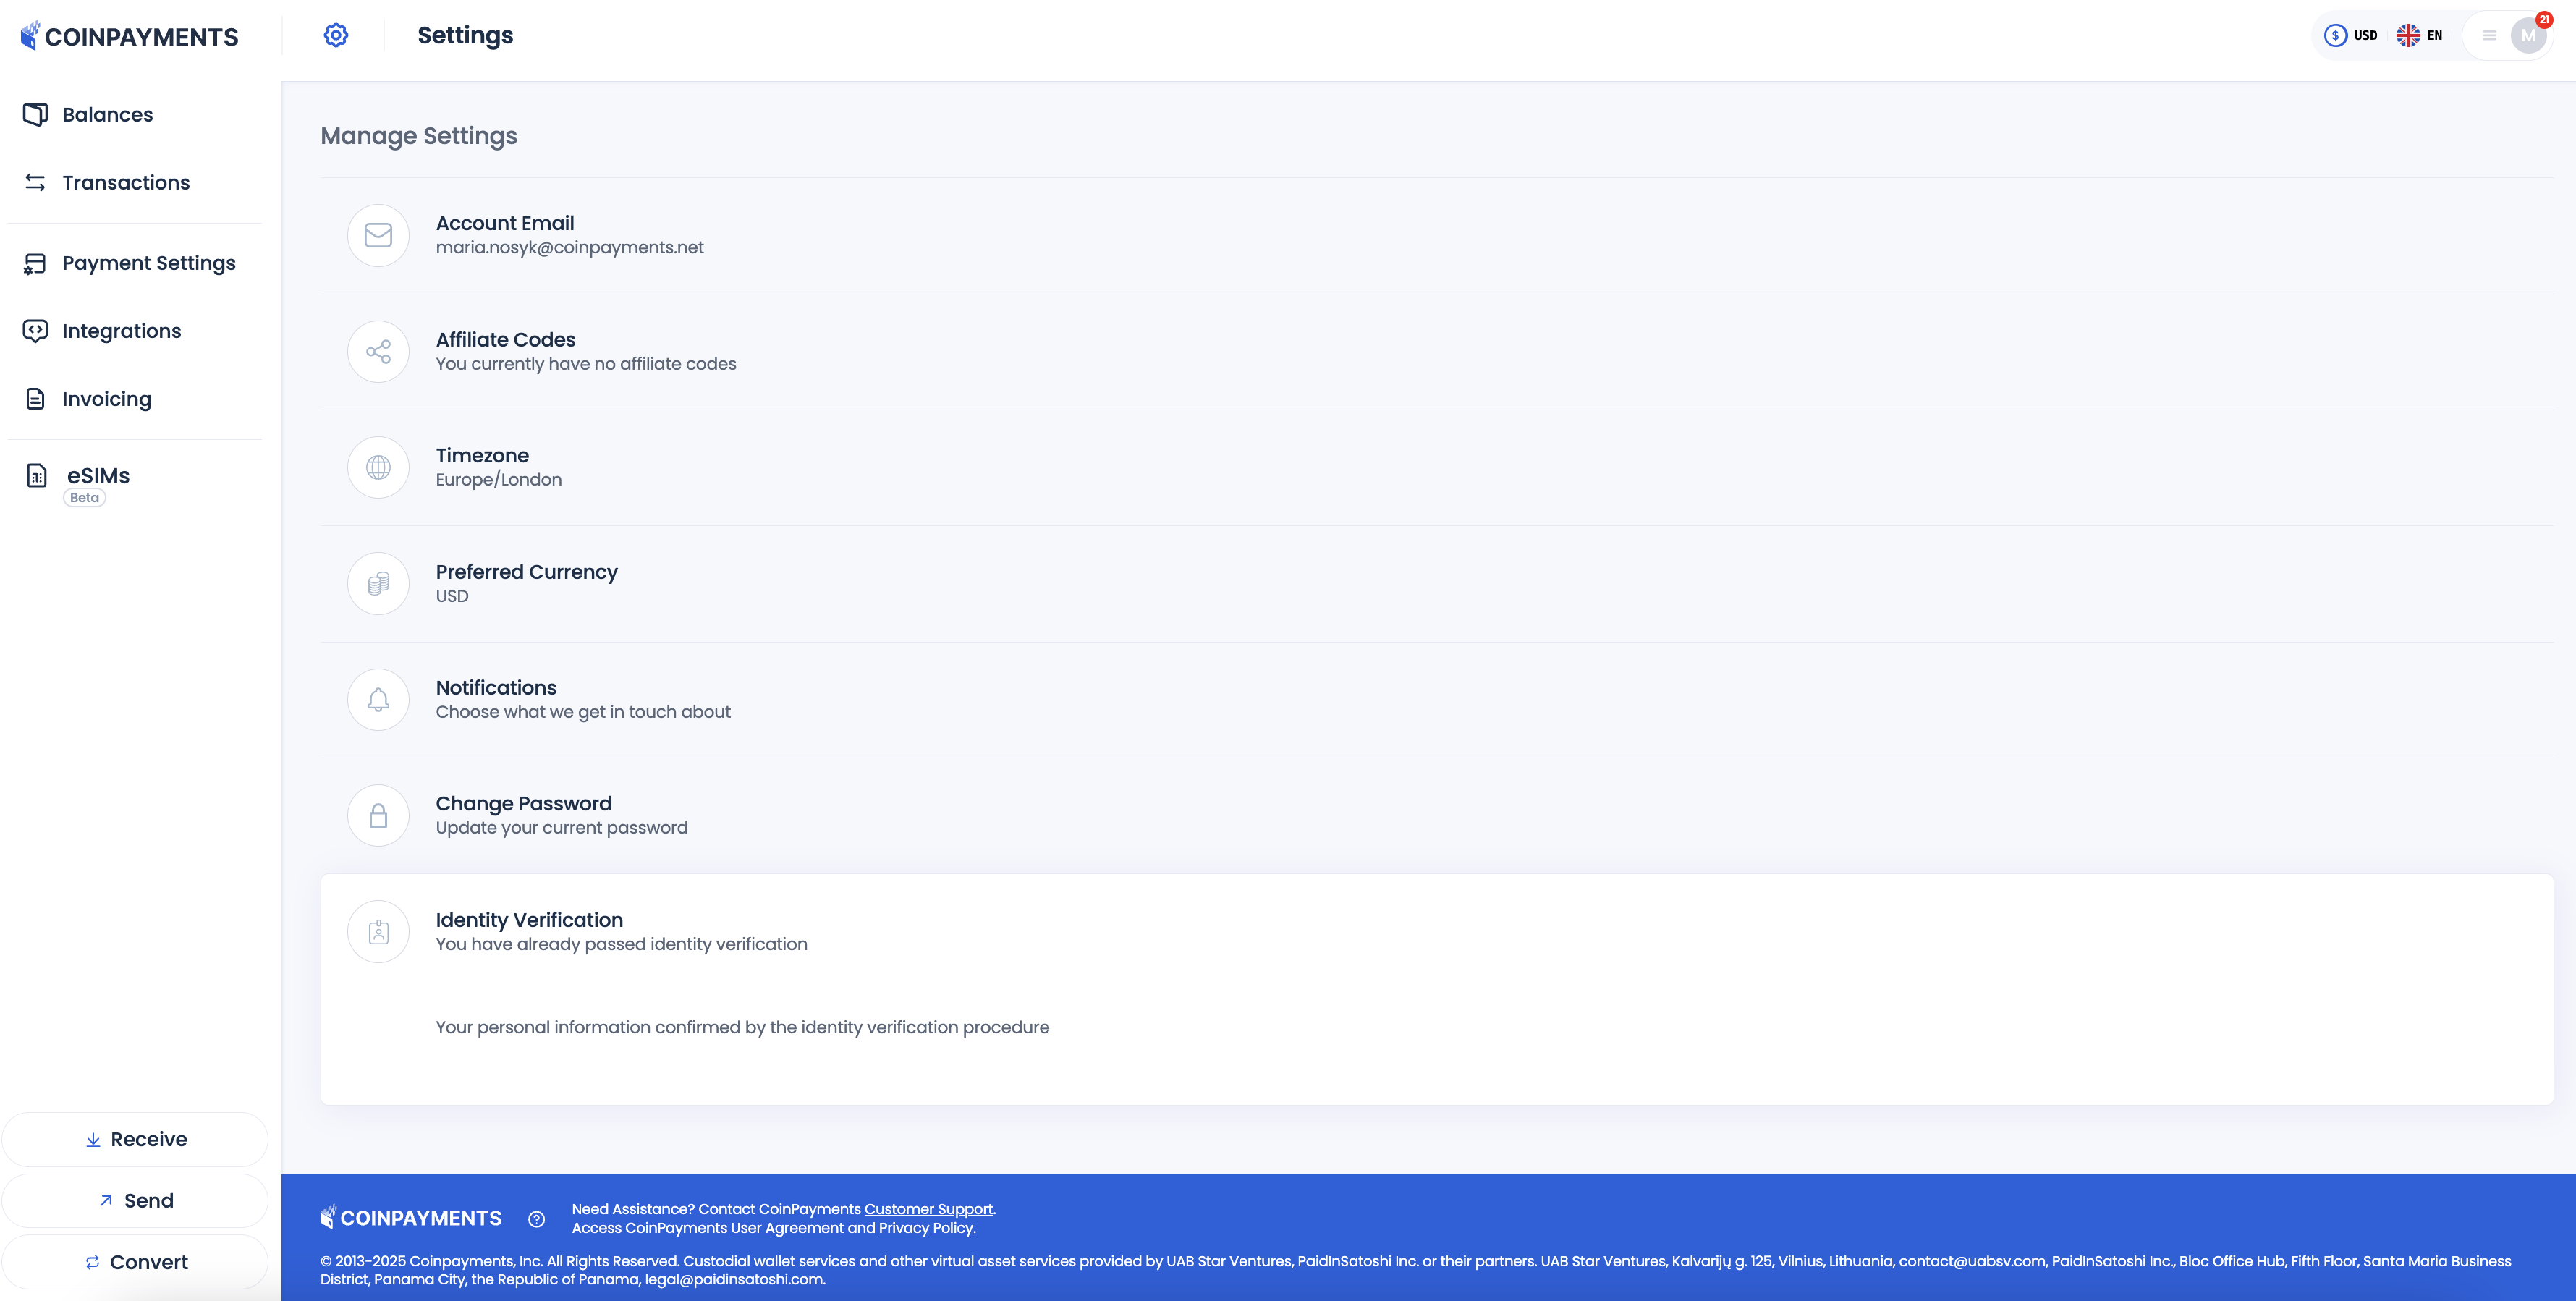
- Identity Verification: If not yet completed, you can finalize verification from this tab.
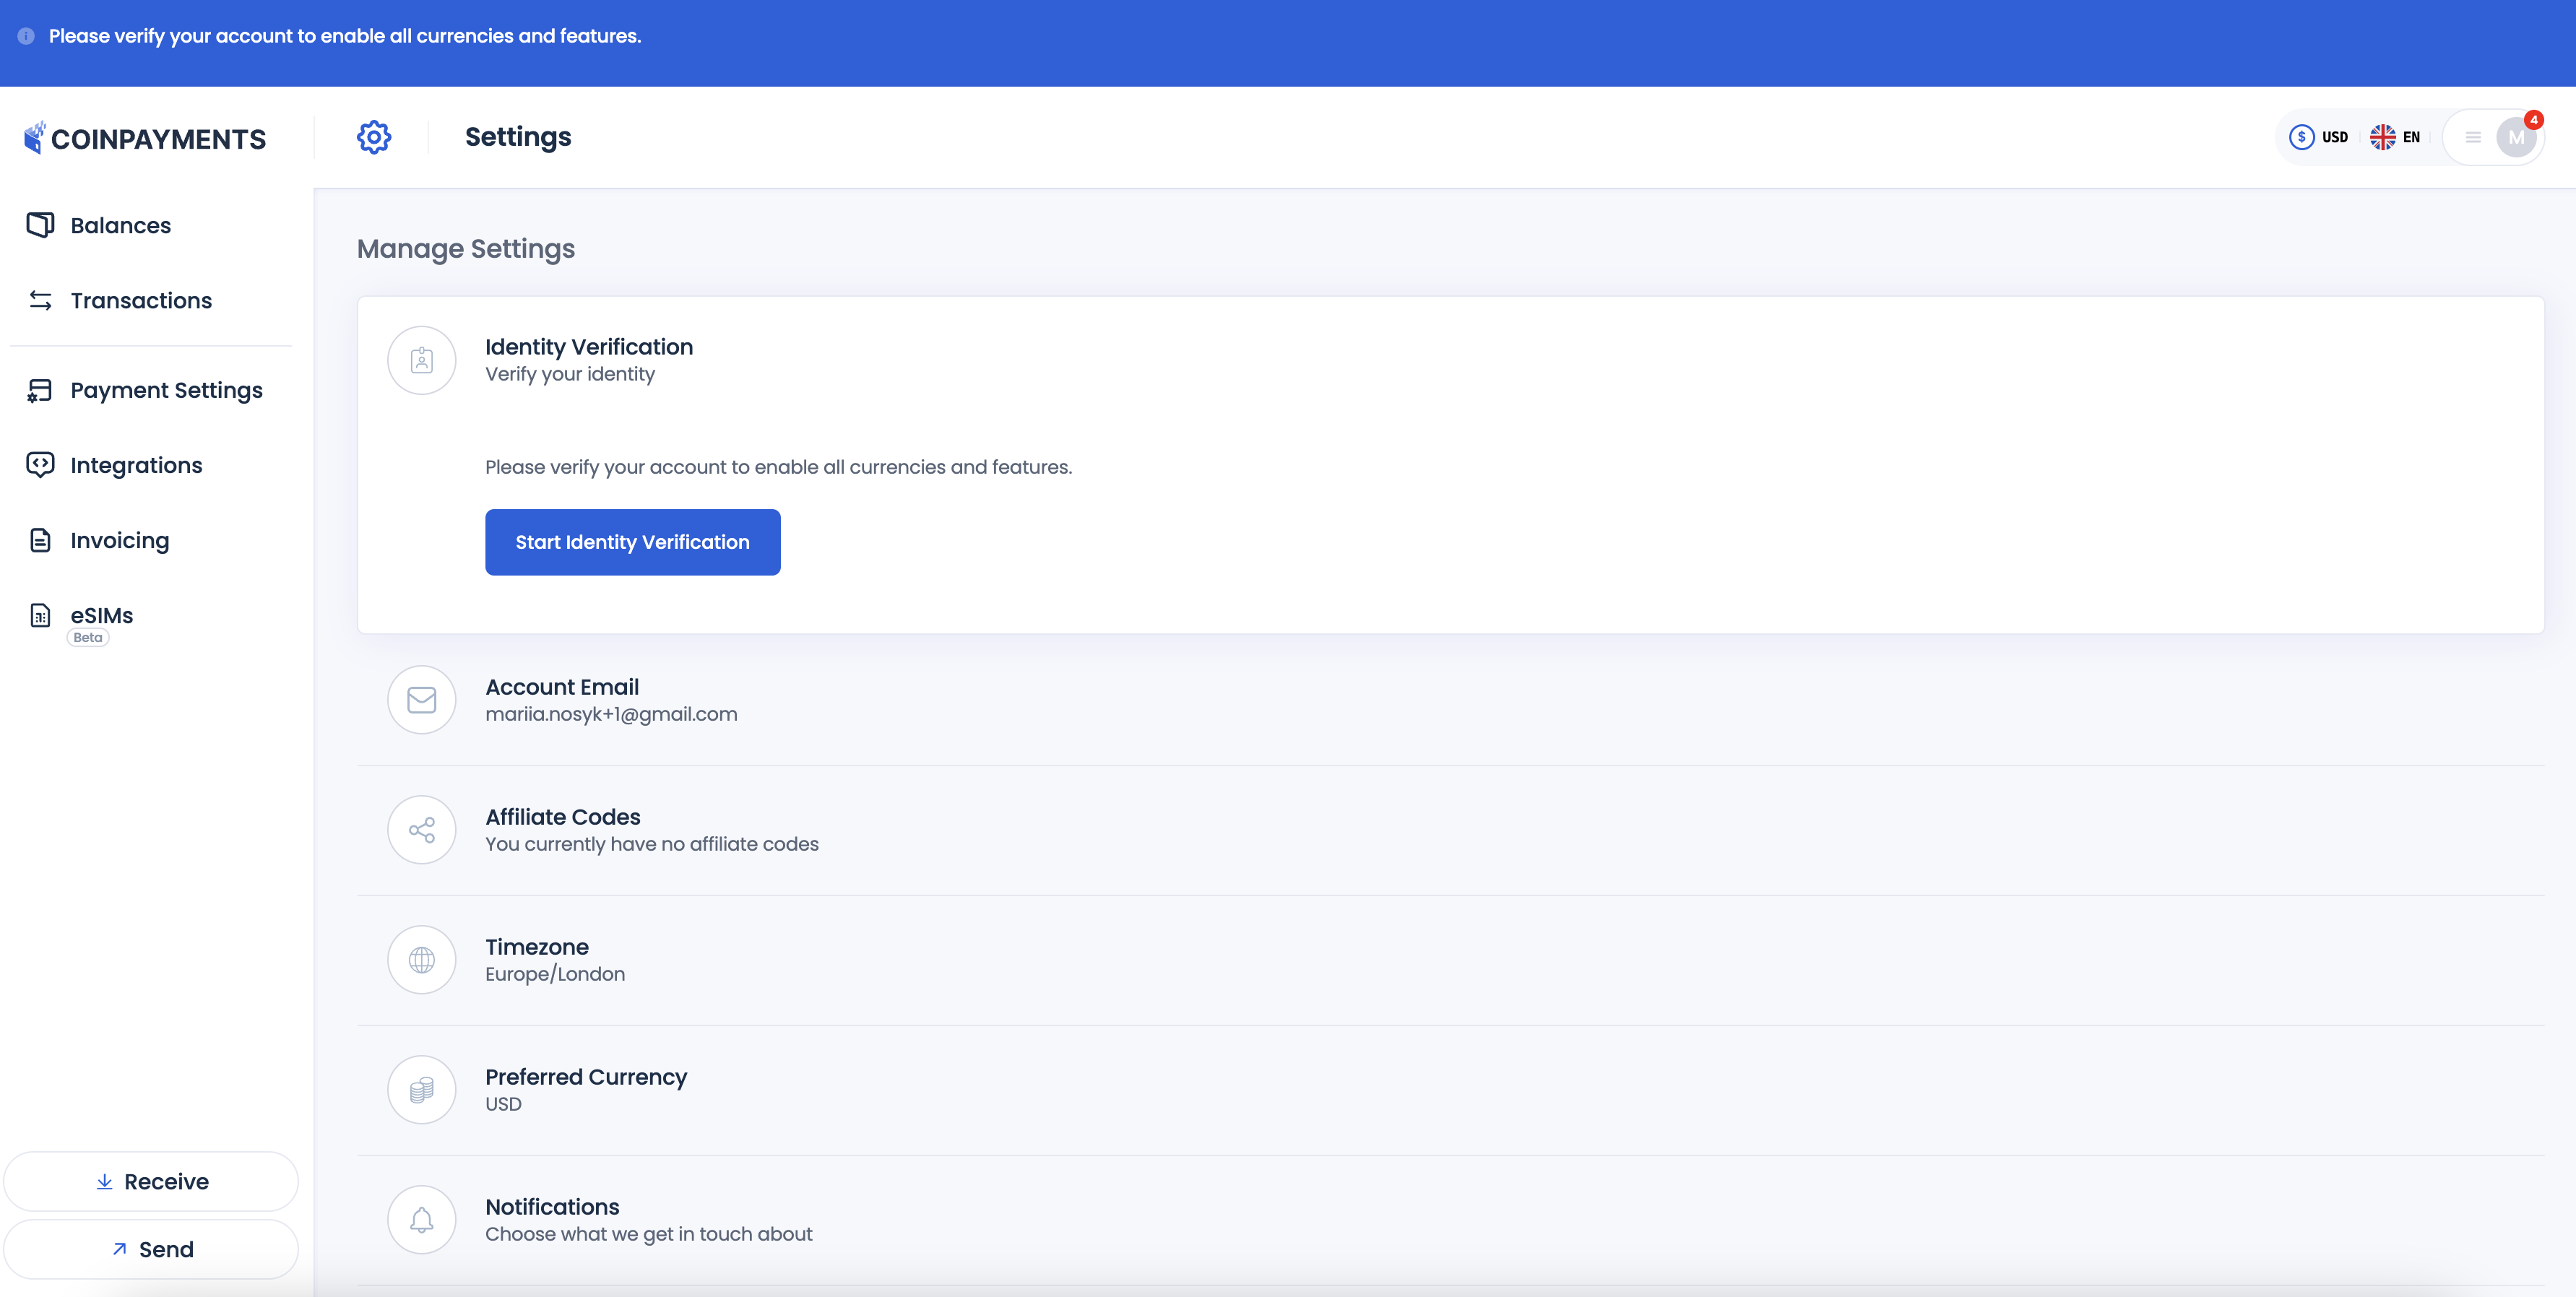
Check Verification Status
You can also check the verification status here - if your data has been already verified or not.
Payment Settings
Managing your payment settings is key to ensuring your operations run smoothly. This section will guide you through optimizing your payouts and other options for seamless operations.
CoinPayments makes this process simple by applying advanced optimization mechanisms. By batching payouts and minimizing individual transaction fees, you can save time and reduce costs.
Access Payment Settings
- Navigate to Payment Settings from the dashboard to get started.
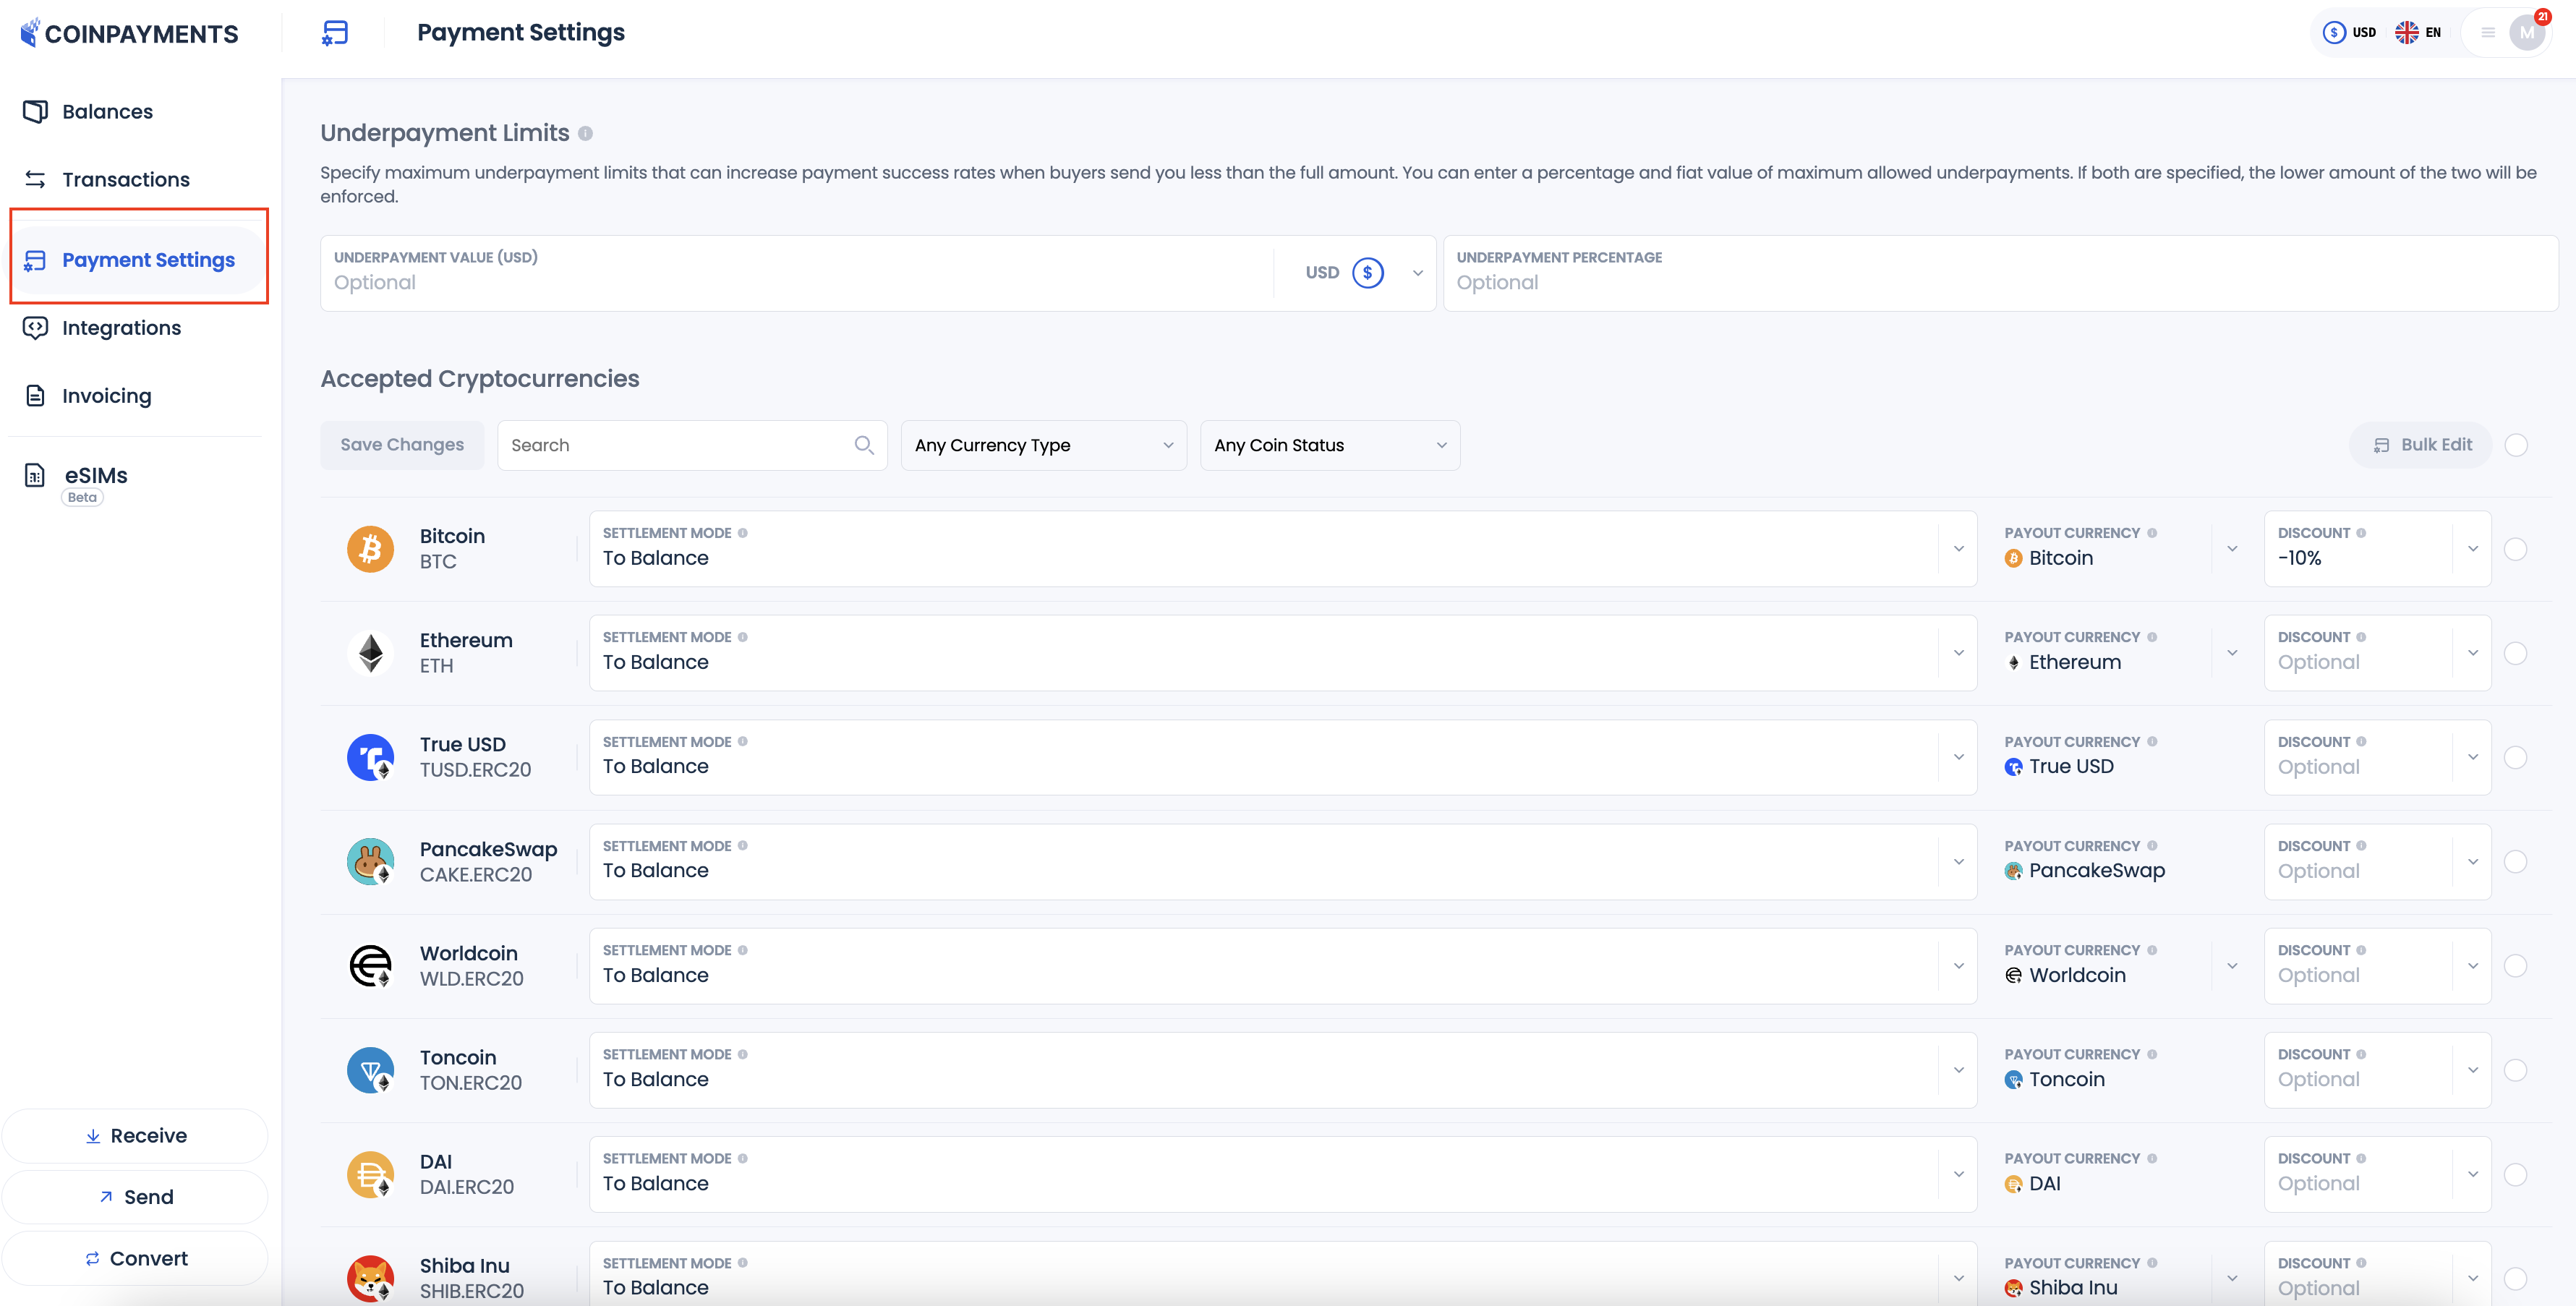
Choose Payout Modes
- Decide how you want to handle your payouts for each enabled currency
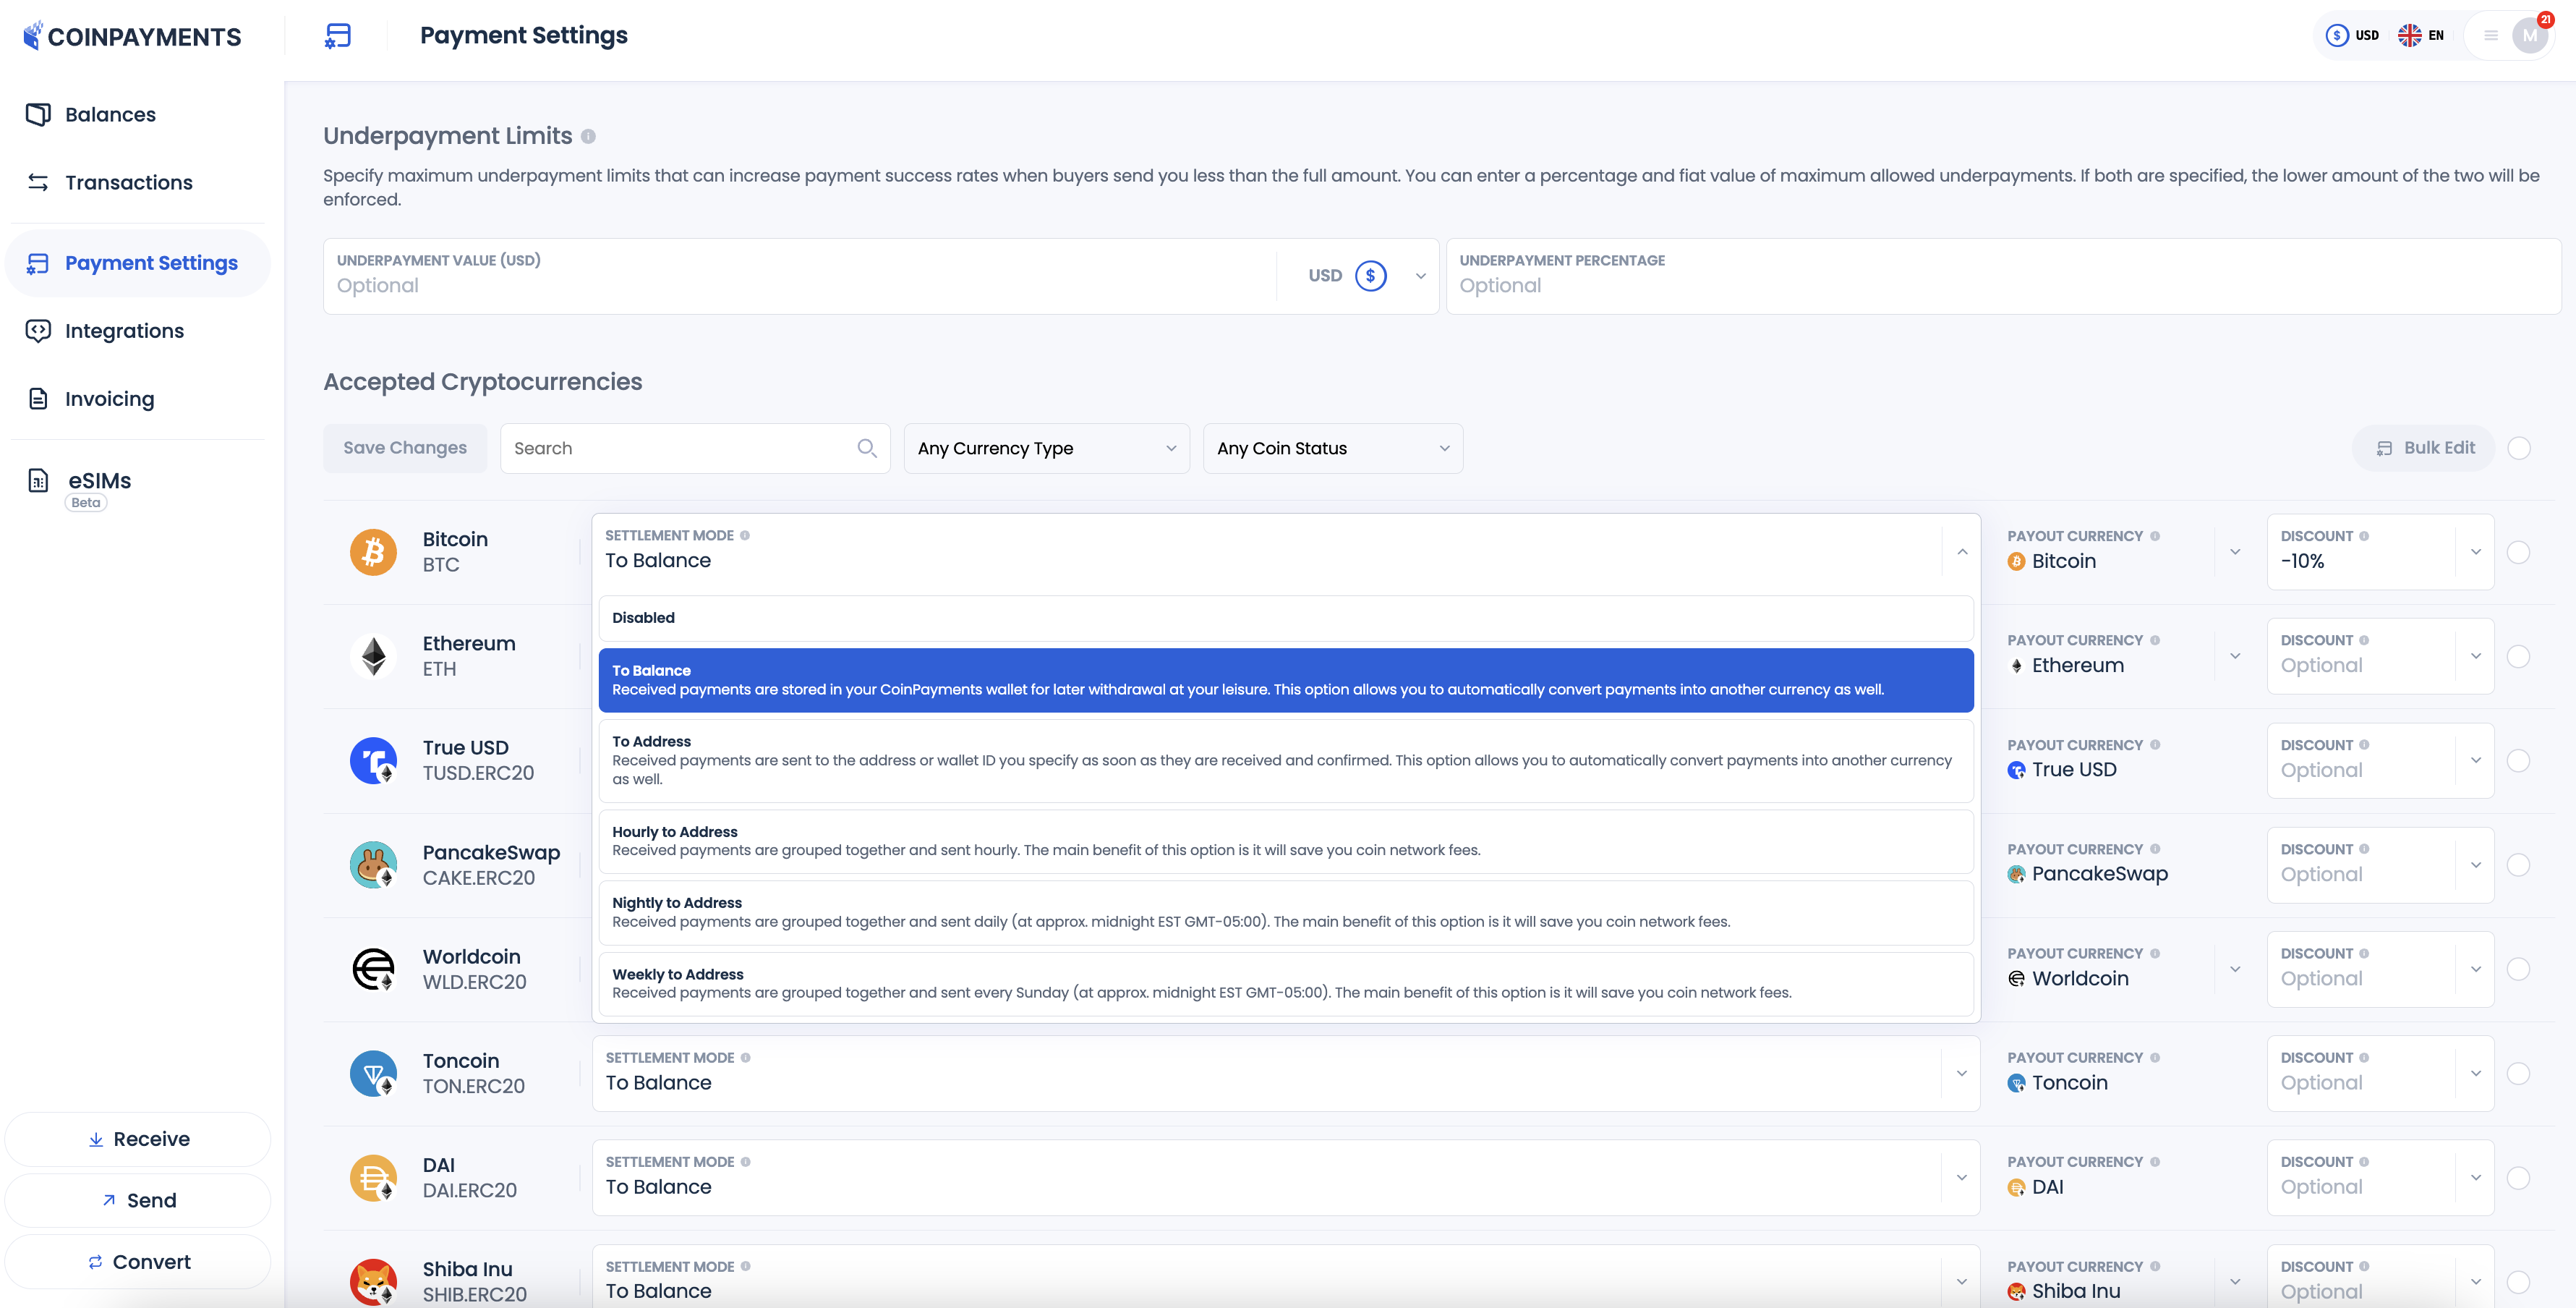
Available options are:
- To Balance: Received payments are stored in your main CoinPayments wallet aka “Primary Wallet” for the selected currency. For security, these funds are accessible only through the CoinPayments Dashboard UI and cannot be accessed via API integrations.
- To Address: Payments are sent to the address or wallet ID specified by you as soon as they receive the required number of confirmations on the blockchain. This can be an internal CoinPayments wallet (merchant/API address) or an external wallet. Funds sent to a CoinPayments wallet are accessible through both the Dashboard UI and API (by the API client that created the wallet/address).
- Hourly to Address: Payments are grouped and sent to the specified address or wallet ID every hour. This option helps reduce network fees from batching transactions sent to external addresses. Any transfers to internal CoinPayments wallets/addresses occur instantly and without additional transaction fees. Funds sent to a CoinPayments wallet remain accessible via both the Dashboard UI and API (by the API client that created the wallet/address).
- Nightly to Address: Payments are grouped and sent every night at approximately midnight (GMT-05:00). This option also helps save on network fees. Funds sent to a CoinPayments wallet remain accessible via both the Dashboard UI and API (by the API client that created the wallet/address).
- Weekly to Address: Payments are grouped and sent every Sunday at approximately midnight (GMT-05:00). This option is ideal for minimizing transaction costs. Funds sent to a CoinPayments wallet remain accessible via both the Dashboard UI and API (by the API client that created the wallet/address).
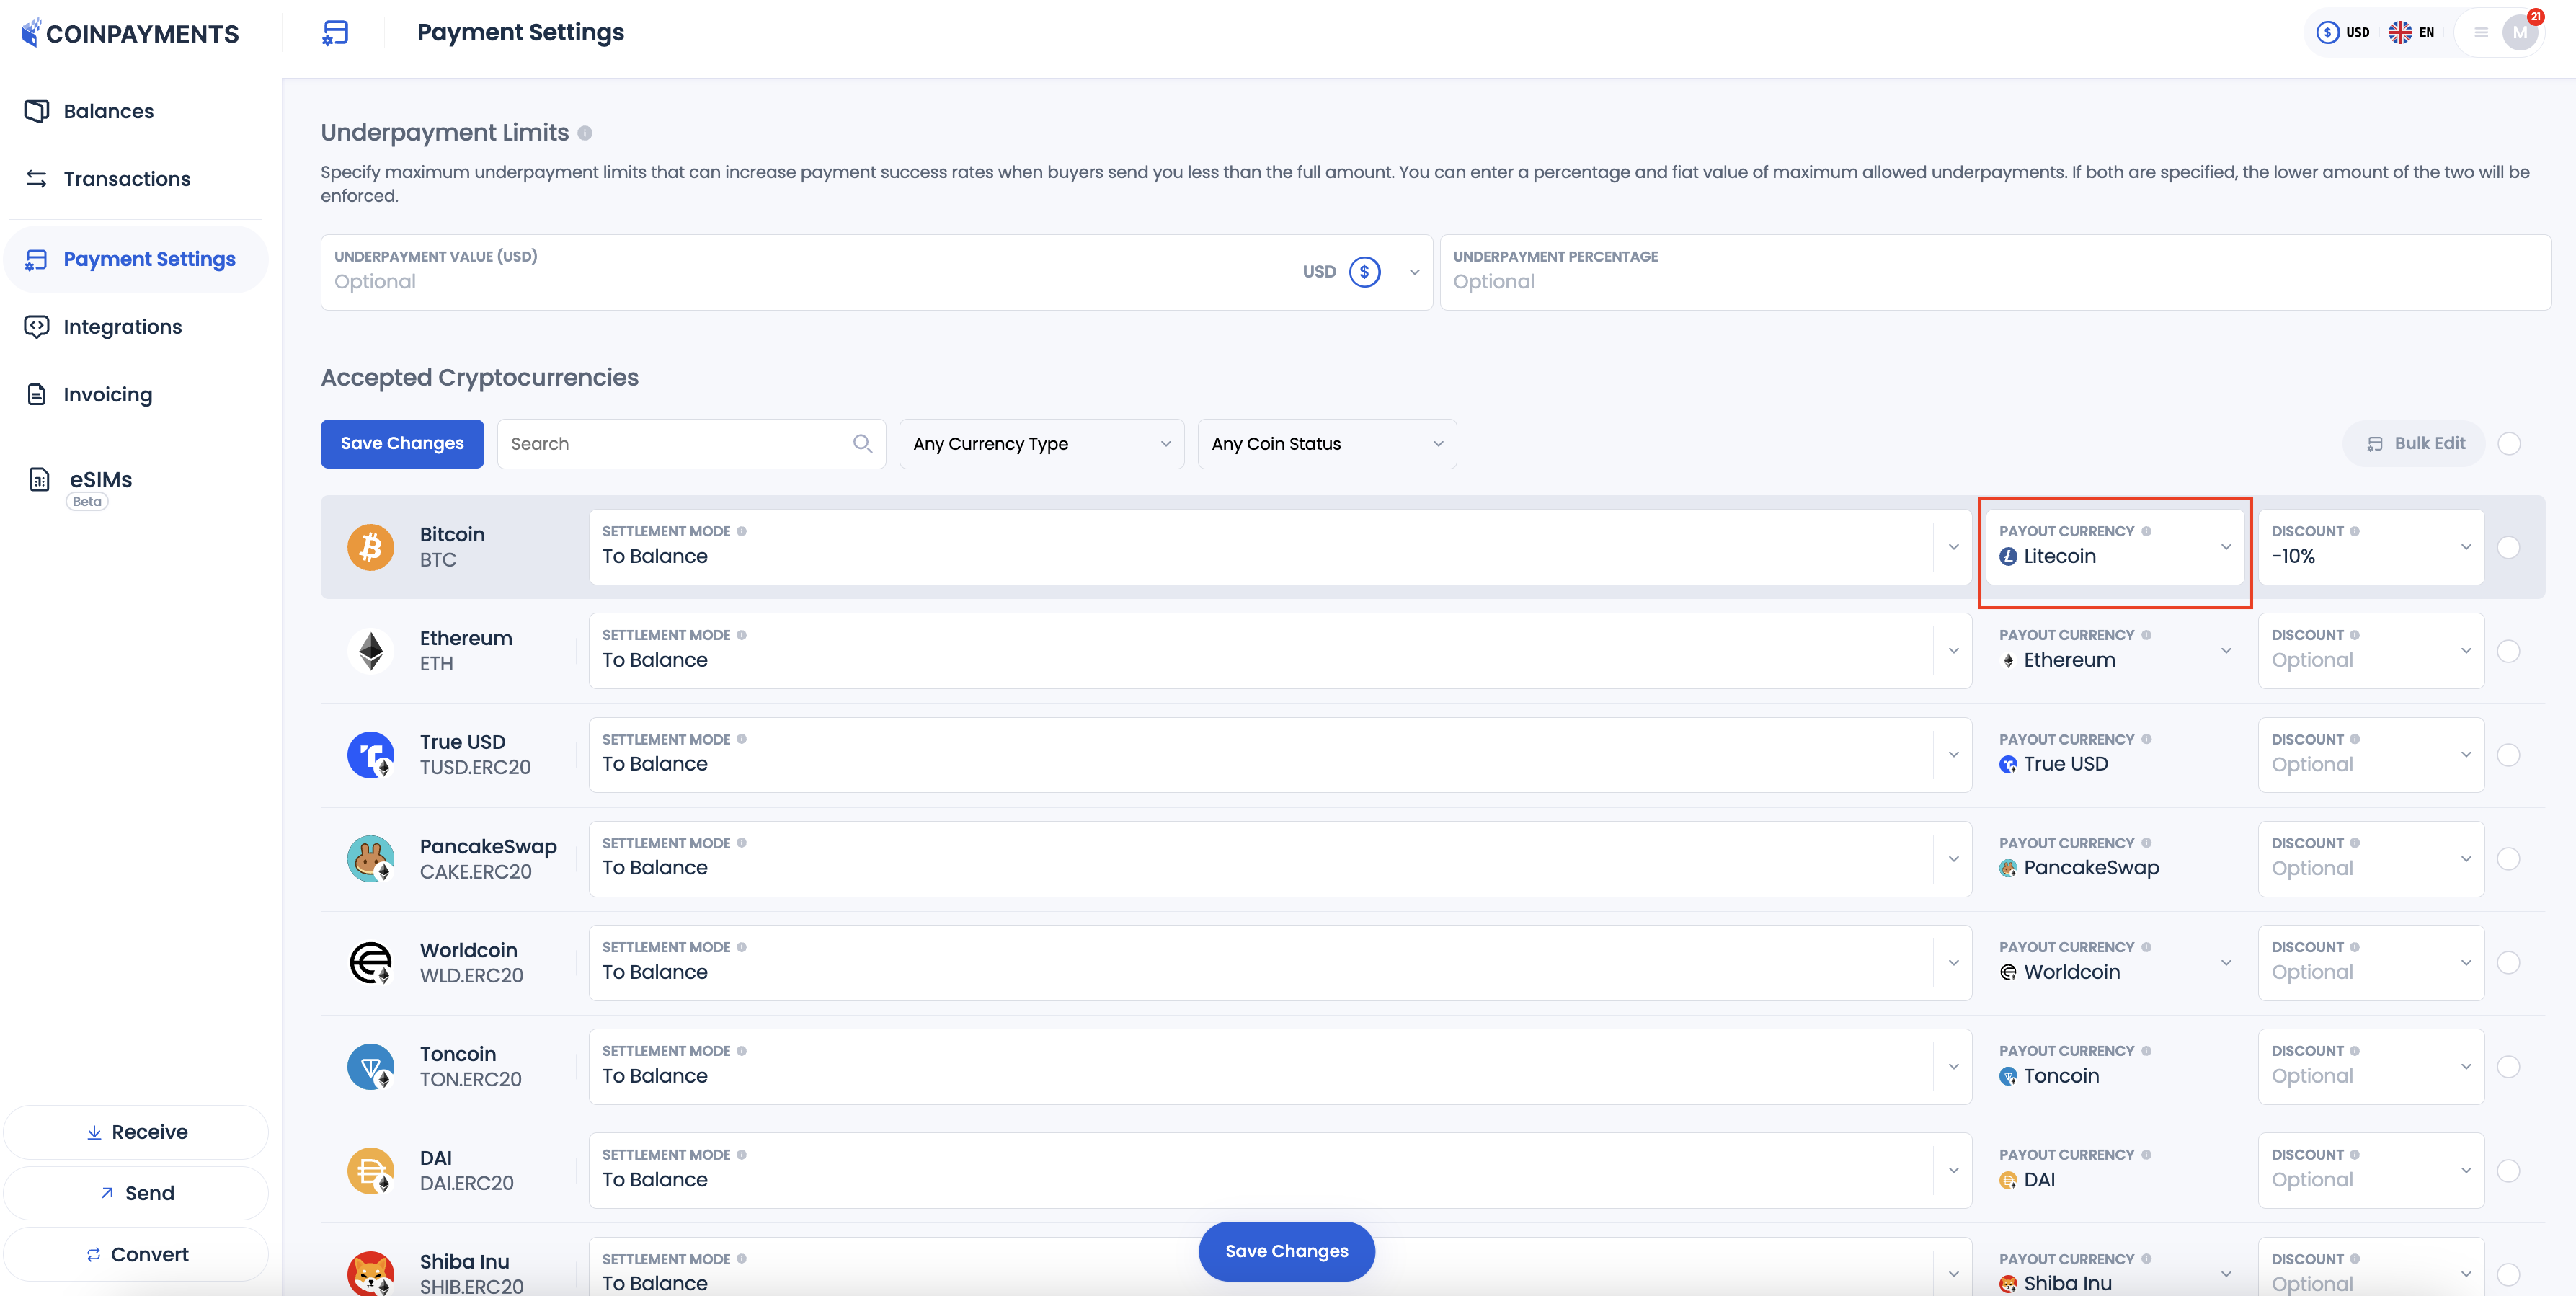
Enable Payout Conversion
- Convert incoming payments into another currency before they're sent to your wallet. For instance, you can set up Bitcoin (BTC) payments to be converted into Litecoin (LTC) and sent directly to your LTC wallet.
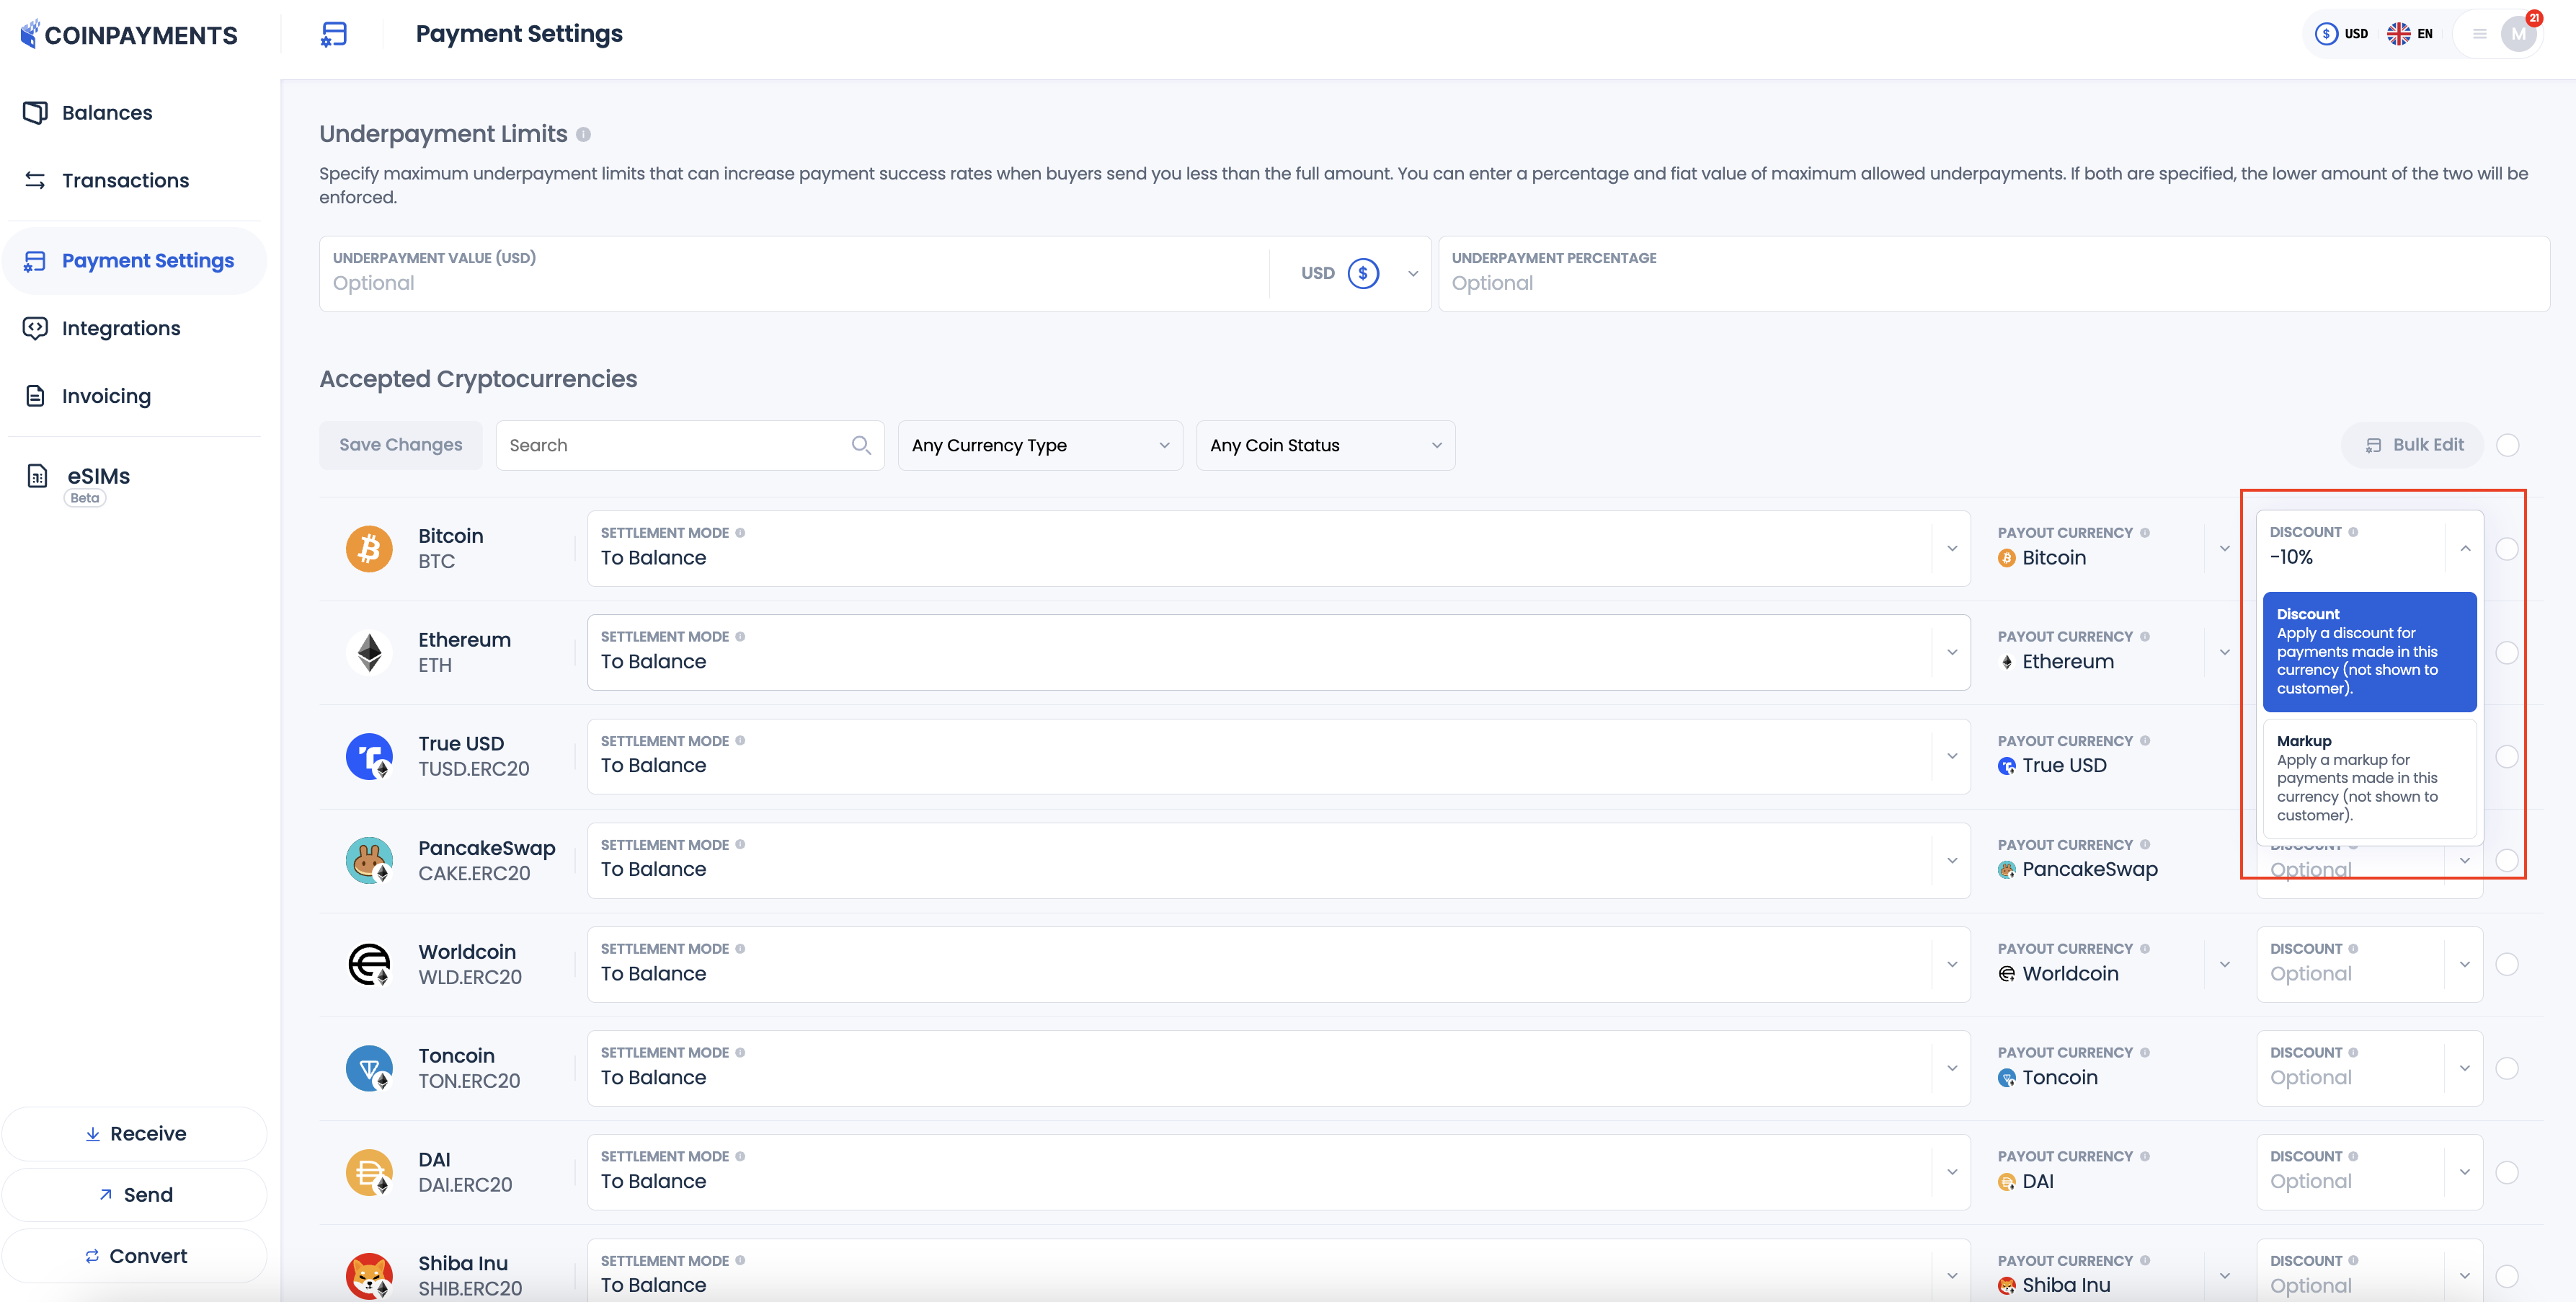
Set Discounts and Markups
- Incentivize your customers to use certain currencies by offering discounts.
- Apply markups to specific currencies to offset any associated network fees.
- Select an option for each currency from the dropdown list. Then provide the value of the discount or markup.
Manage Underpayment Settings
Cryptocurrency rates are volatile which often leads to underpayments from customers. However, sometimes it is more beneficial for the merchant to receive the payment with a small underpayment rather than lose the deal completely.
Set the underpayment amount in absolute fiat value or percentage from the received payment to close the deals promptly without dealing with refunds and double-payments:
-
Select the fiat currency according to which the underpayment value is calculated:
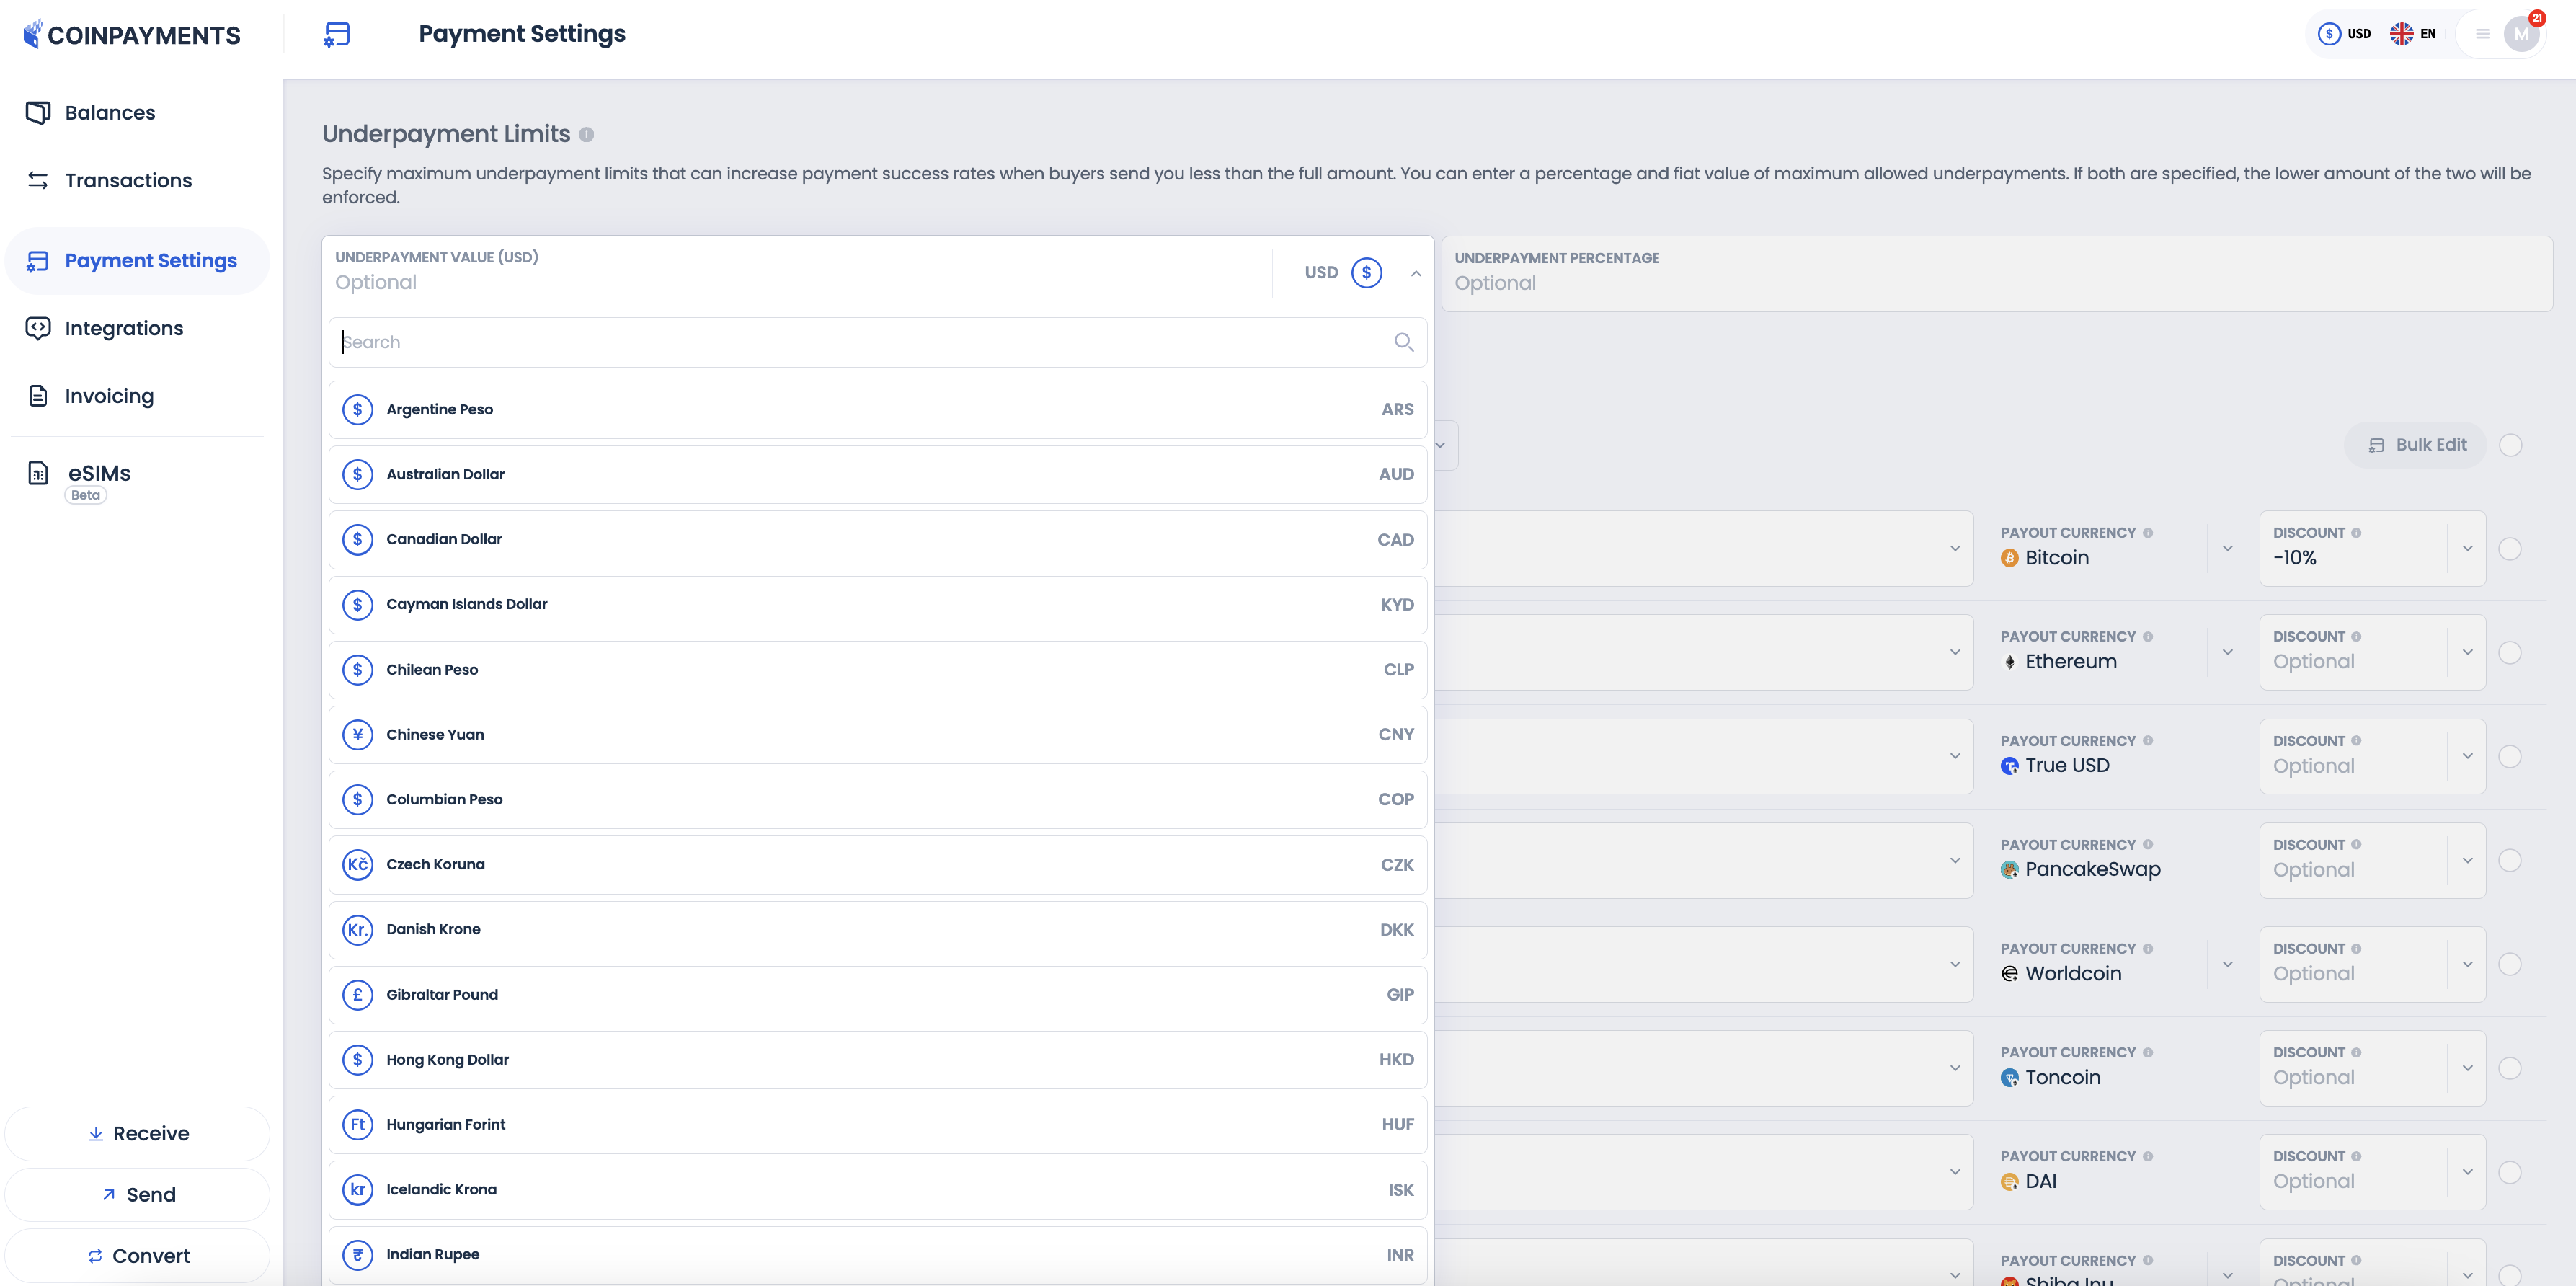
-
Set the value of underpayment in the absolute value of the currency or in percentage of a payment.
You can specify both values in which case the lower amount of the two will be applied.

For example, you issue an invoice for 100$. Buyer sends 98$ of crypto. With the settings specified as above, this payment will be closed immediately upon receipt. However, if the buyer sends 95$ of crypto, such payment will be treated as underpayment and will not be accepted automatically.